Documentation This documentation applies only to iceScrum v7.
For old iceScrum R6, read the documentation or migrate.
-
1 - Install or Upgrade
-
2 - Getting started
-
3 - Core features
4 - Apps & integrations
Neatro
Companion
MURAL
Microsoft Teams
Discord
iObeya
Zoom
Google Hangouts Meet
Jamboard by Google
Miro
Jitsi Meet
Mattermost
Custom project dashboard
Agile KPIs
Webhooks
Forecast
Agile fortune
SAML Authentication
Labels
Share
Zapier
Story workflow
FeatureMap
Time tracking
Diagrams & mockups
Epic stories
Portfolio
Project Roadmap
Toolbox
External authentication
Continuous integration
Cloud attachments
Team capacity
Bug trackers
LDAP / Active Directory
Slack
Project administration
User administration
Server administration
Git & SVN
Data export
Mood
Excel import
Task responsible
Story vote
Story template
Apps & integrations
Custom Backlogs
-
5 - Migration
-


Keep track of code changes by linking your commits to your tasks and user stories.
Principles
This feature is divided into several Apps depending on your version control system. You may also be interested in the Continous Integration feature.
Link commits and tasks
Let’s start by an example. Assuming that I am responsible of the task 18 in iceScrum named “Add car domain”, once the code is ready to submit I write my commit message:
New car domain class
Here is how I link this commit to Task 18:
T18 New car domain class
The T18 tags can be located anywhere in the commit message so this is equivalent to the previous commit message:
New car T18 domain class
Once the commit is sent, information for this commit will be displayed in Task 18 details in a dedicated tab:
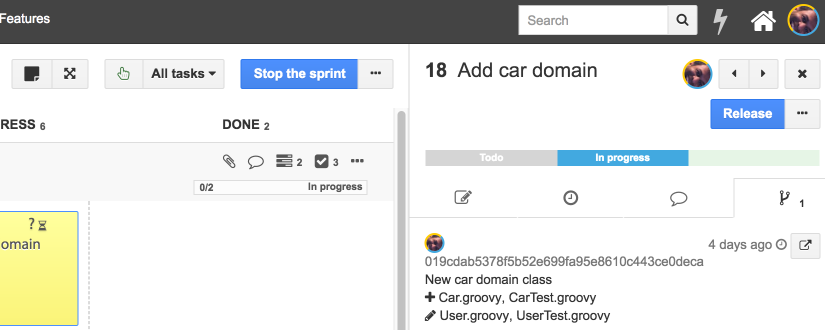
For each commit, this information is displayed:
- Author: if the commit author is recognized in iceScrum (username, full name, email) then the commit is associated with the corresponding iceScrum user.
- Message: tasks tags are removed from the original message to make it more readable.
- Date: the commit date.
- Files: the files added, removed and modified in your commit.
You can reference as many tasks as needed in your commit message:
New business object: supplier T21 T22 T23
Commits are associated to a task only if its sprint is “In progress”.
Commits and stories
The Story details view also provides a “Commits” tab that aggregates all the commits of its tasks.
Update task remaining time
You can optionally update the task remaining time from your commit message.
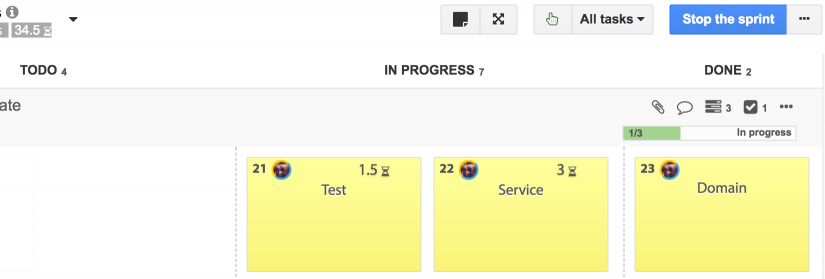
In this example, I update the remaining time of task 21 to 1 hour and a half, task 22 to 3 hours and there is no work left on task 23 so I update its remaining time to 0:
New business object: supplier T21-1.5 T22-3 T23-0
The remaining time is updated accordingly and task 73 has no remaining time left so it has moved to “Done”:
Here are the update rules:
- If the new remaining time is positive and the Task is not Done then the remaining time is updated accordingly.
- If the new remaining time is not specified or positive and the task is “Todo” then the task is moved to “In Progress”.
- If the new remaining time is 0 then the task is moved to “Done”.
Link one code repository to multiple iceScrum projects
Starting from iceScrum 7.27, it is possible to link commits from one repository to several iceScrum projects.
This documentation illustrates mainly the simple case where there is only one project and the project is provided once for all through the URL configured to communicate with iceScrum. Thus, for multiple projects the first step consists in leaving out this project part (i.e. /project/$project) from the URL in all the examples provided in this documentation.
If you use the provided Git or SVN scripts then you will have to edit the code manually in order to build an URL that leaves out this part. Otherwise, just adapt the URL you enter.
E.g. for Gitlab, instead of:
/ws/project/MYPROJECTKEY/commit/gitlab
Use:
/ws/commit/gitlab
However, iceScrum still needs to know which project to attach a commit to. Thus, all task tags should be prefixed by the project key of the project they belong to:
New car MYPROJECTKEY-T18 domain class
Git
If you use GitHub or GitLab, you can ignore the following and skip to the corresponding section.
First, enable the Git App on your project.
To connect your Git repository to the corresponding iceScrum project, you have to add a post-receive script in the YOUR-REPO/.git/hooks/ directory.
You can write your own script but we recommend using this one: post-receive. This script hooks into pushes received by a Git repository.
It requires Ruby and Rubygems (grit and json gems):
$ sudo apt-get install ruby-full
$ sudo apt-get install rubygems
$ sudo gem install grit
$ sudo gem install json
Give it execution permissions:
$ chmod +x post-receive
Then, configure the connection to iceScrum by using the git config command in your repository:
$ git config icescrum.url "http://www.example.com/icescrum/"
$ git config icescrum.project "MYFIRSTPROJ"
$ git config icescrum.accesstoken "changeto112323435yourtoken"
Learn to generate an iceScrum API token.
You can optionally configure the Git URL if you use a web-based tool:
$ git config icescrum.giturl "http://localhost:3546/gitweb/"
This example sets the configuration only for the current repository (settings are written in the .git/config file). If you want to apply them to all the current user’s repositories then use the global option (global settings are written in the ~/.gitconfig file).
SVN
First, enable the SVN App on your iceScrum project.
To connect your SVN repository to the corresponding iceScrum project, you have to add a post-commit script on your server, in the YOUR-REPO/hooks/ directory.
You can write your own script but we recommend using this one: post-commit.
This script requires Ruby and a Rubygem (json):
$ sudo apt-get install ruby-full
$ sudo apt-get install rubygems
$ sudo gem install json
Give it execution permissions:
$ chmod +x post-commit
Then, configure the access to iceScrum by editing the script:
icescrum_url = "http://www.example.com/icescrum/"
pkey = "MYFIRSTPROJ"
access_token = "changeto112323435yourtoken"
Learn to generate an iceScrum API token.
You can optionally configure the SVN URL if you use a web-based tool:
svnviewer_url = "http://svnviewer/svn-history/"
GitHub
First, enable the GitHub App on your iceScrum project.
Notice: the integrated GitHub service for iceScrum is only compatible with iceScrum R6. For integration between GitHub and iceScrum v7, simply add a webhook to your GitHub repository as described below.
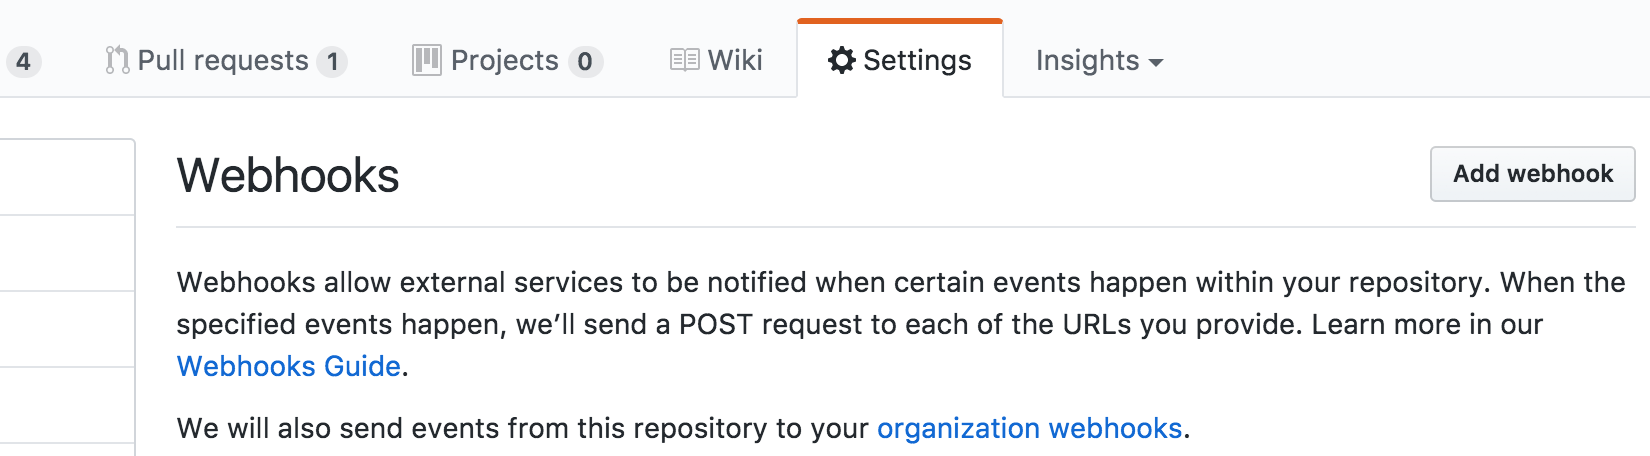
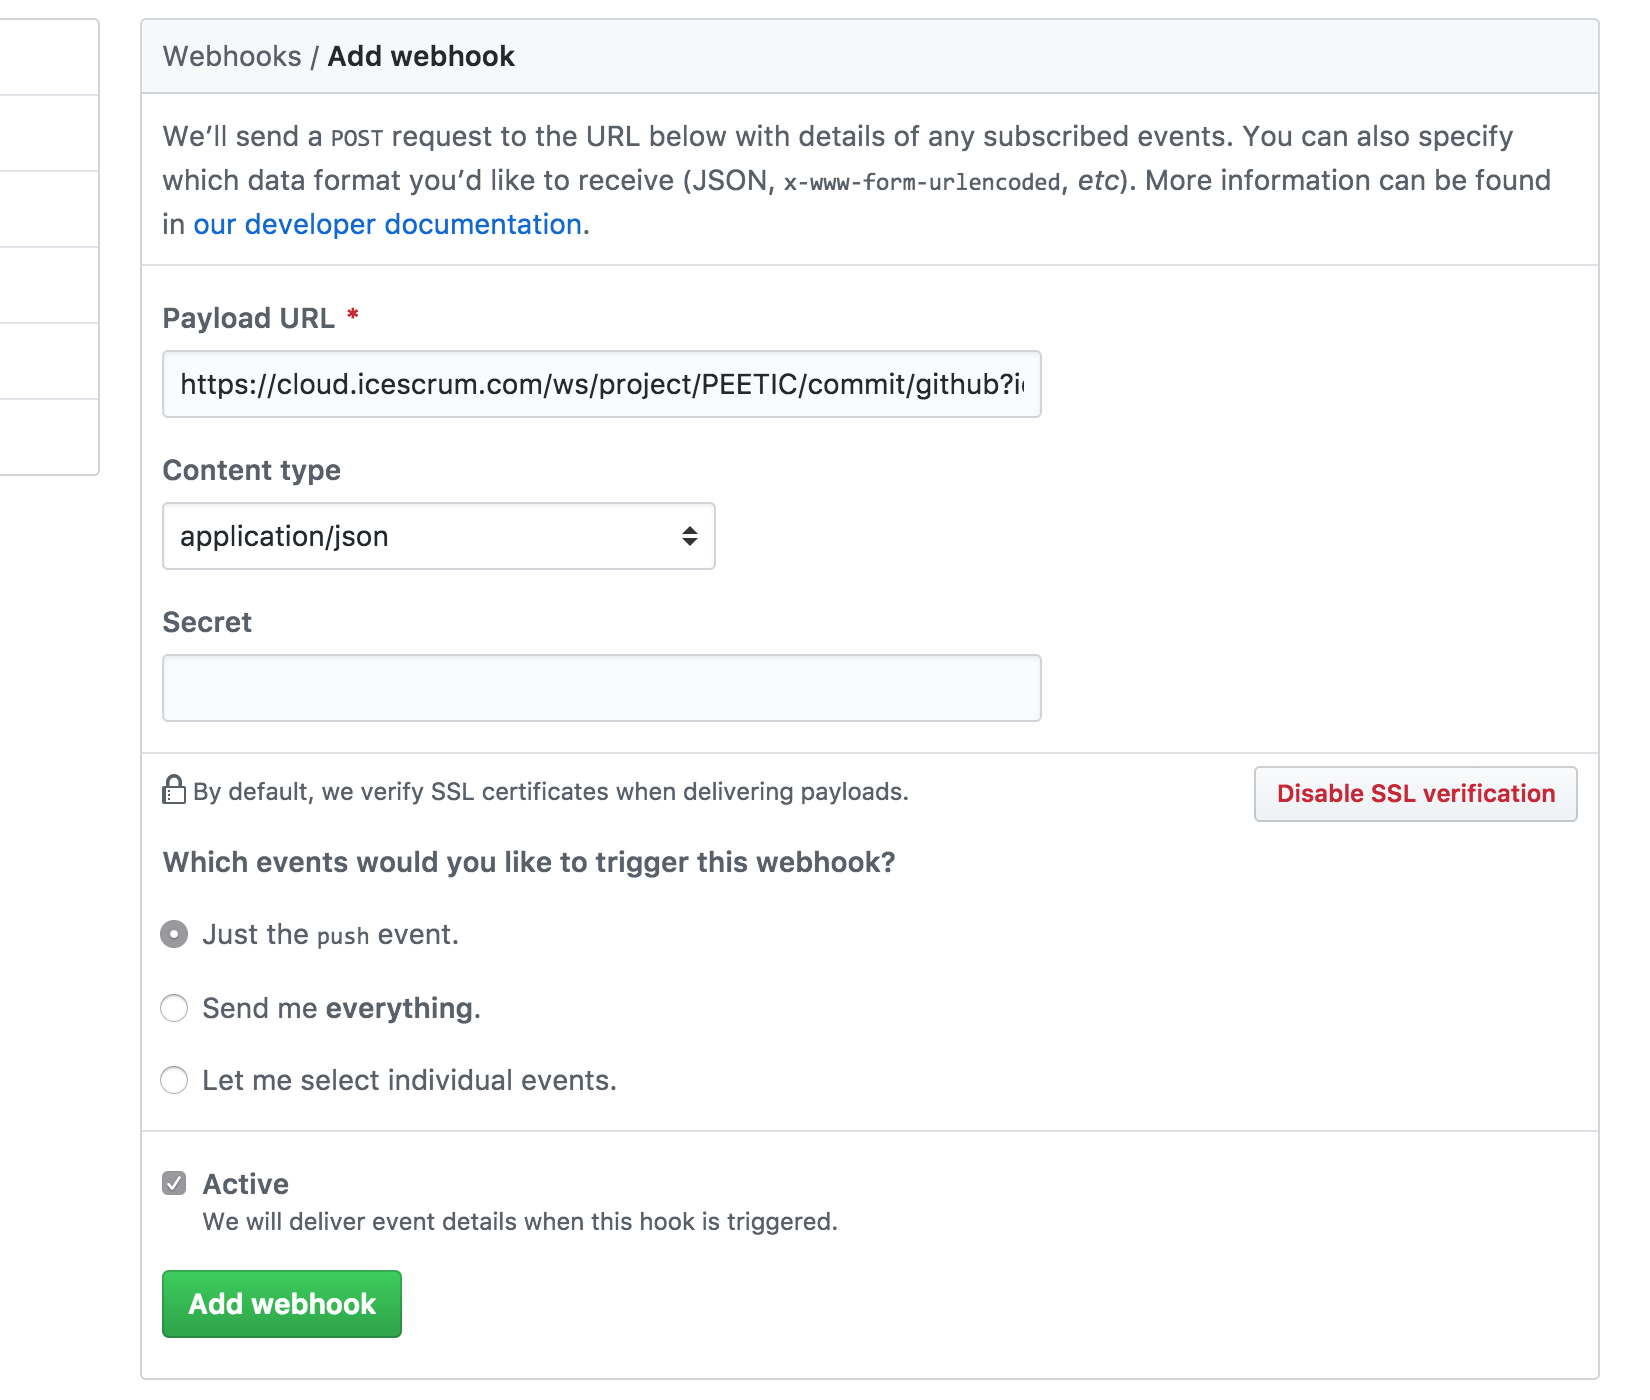
Add a webhook to your GitHub repository. In the “Settings” tab of your GitHub repository, under the “Webhooks” section, click on “Add webhook”.
The payload URL is built this way:
$server/ws/project/$project/commit/github?icescrum-token=$access_token
- server: the URL of your iceScrum server. For iceScrum cloud instances it is
https://cloud.icescrum.com
- project: your iceScrum project ID or key
- access_token: iceScrum API access token. Learn to generate an iceScrum API token.
Payload URL example for cloud project PEETIC :
https://cloud.icescrum.com/ws/project/PEETIC/commit/github?icescrum-token=dad27aff397bfes32fdab987
To connect a GitHub Repository to an iceScrum project, fill in the following fields:
- Payload URL: the payload URL you just built.
- Content type: application/json.
- Triggers: just the push event.
- Active: surprisingly the web hook is only active if “active” is checked.
GitLab
First, enable the GitLab App on your project.
Then, you will have to create a GitLab webhooks activated on push events: https://docs.gitlab.com/ee/user/project/integrations/webhooks.html.
Assuming that you have a project with the key MYPROJECTKEY, the hook URL is the URL of your iceScrum server followed by:
/ws/project/MYPROJECTKEY/commit/gitlab
Here is an example of the URL to configure if you use iceScrum Cloud:
https://cloud.icescrum.com/ws/project/MYPROJECTKEY/commit/gitlab
As of iceScrum 7.42, you must provide your iceScrum token through the X-Gitlab-Token header. The token must have been generated by an iceScrum user who has access to the project.
Visual Studio Team Services
- VSTS work items: Create iceScrum stories from VSTS work items.
- VSTS CI: Link VSTS builds to iceScrum.
- VSTS code: Link VSTS commits to iceScrum tasks.
You can link commits/changesets in Visual Studio Team Service to your tasks and stories in iceScrum. It works both for Git and Team Foundation Version Control.
There are 2 ways to configure your Visual Studio Team Service environment. The preferred way is to use the iceScrum extension.
with iceScrum extension
First install the iceScrum extension for Visual Studio Team Services.
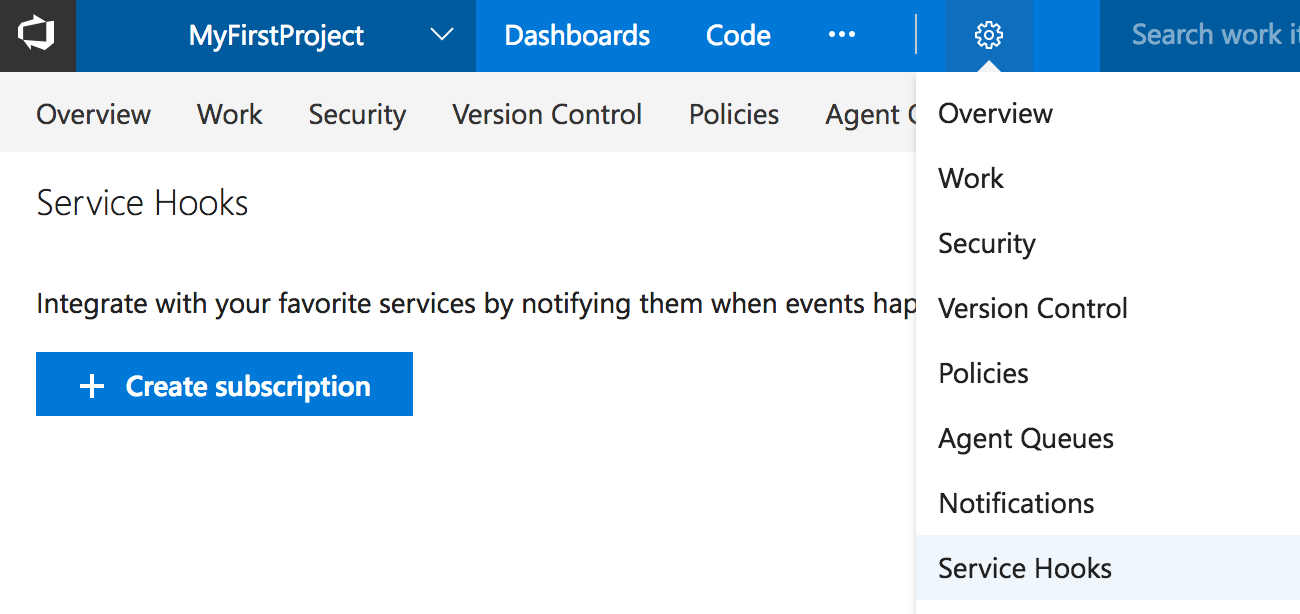
Simply add a Service Hook to your VSTS project. In the Settings tab of your VSTS project, under the Service Hook section, click on Create Subscription.
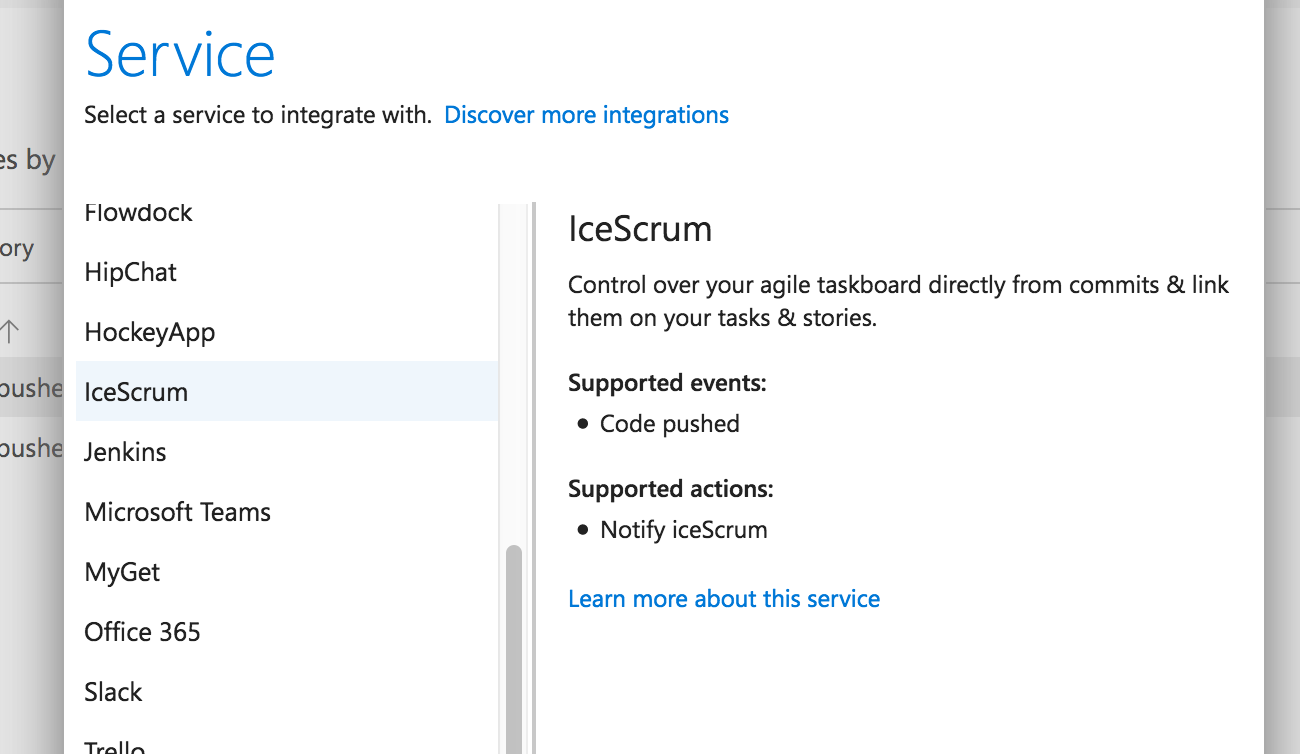
Select iceScrum in the list of service and click next.
You can optionally filter which repositories and branch commits/changesets should be pushed to iceScrum.

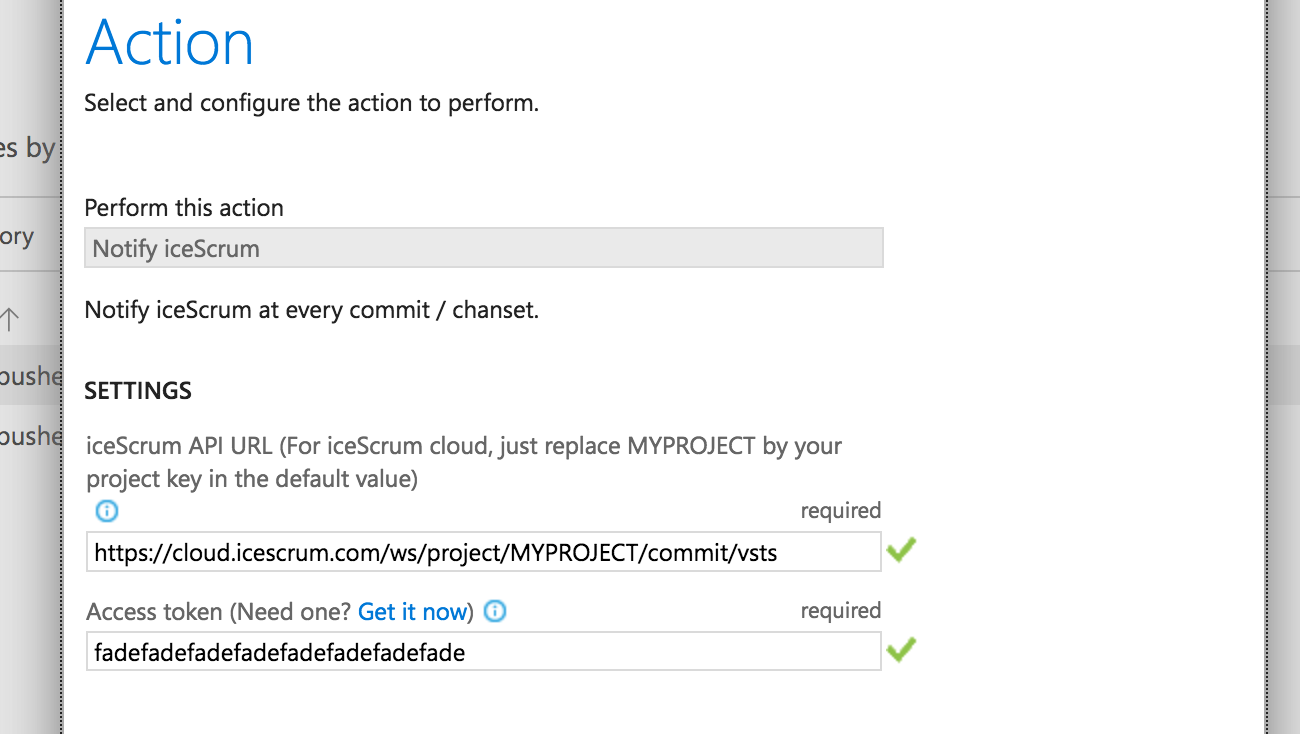
On the next screen you are asked for connection settings. The iceScrum API URL is built this way:
$server/ws/project/$project/commit/vsts
- server: the URL of your iceScrum server. For iceScrum cloud instances it is
https://cloud.icescrum.com
- project: your iceScrum project ID or key
URL example for cloud project PEETIC :
https://cloud.icescrum.com/ws/project/PEETIC/commit/vsts
You will also need an iceScrum API access token. Learn to generate an iceScrum API token.
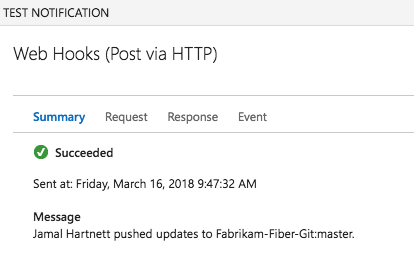
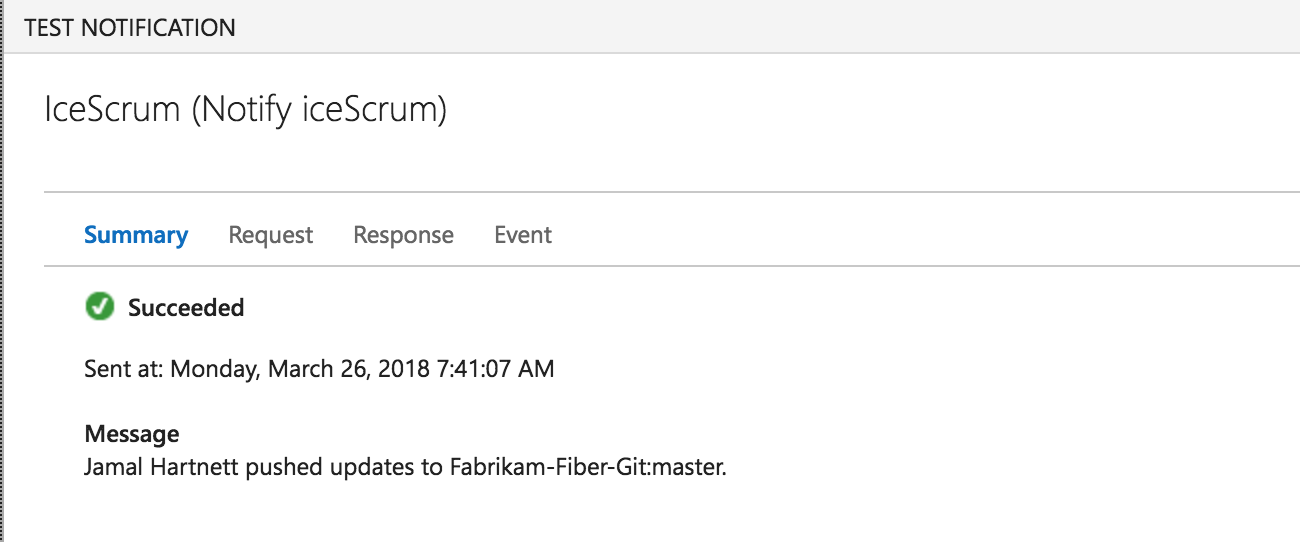
Test, save the Web Hook and that’s it.
The test request should return an HTTP 204 status response, because the test commit does not include any reference to an iceScrum task in its message.
with a service web hook
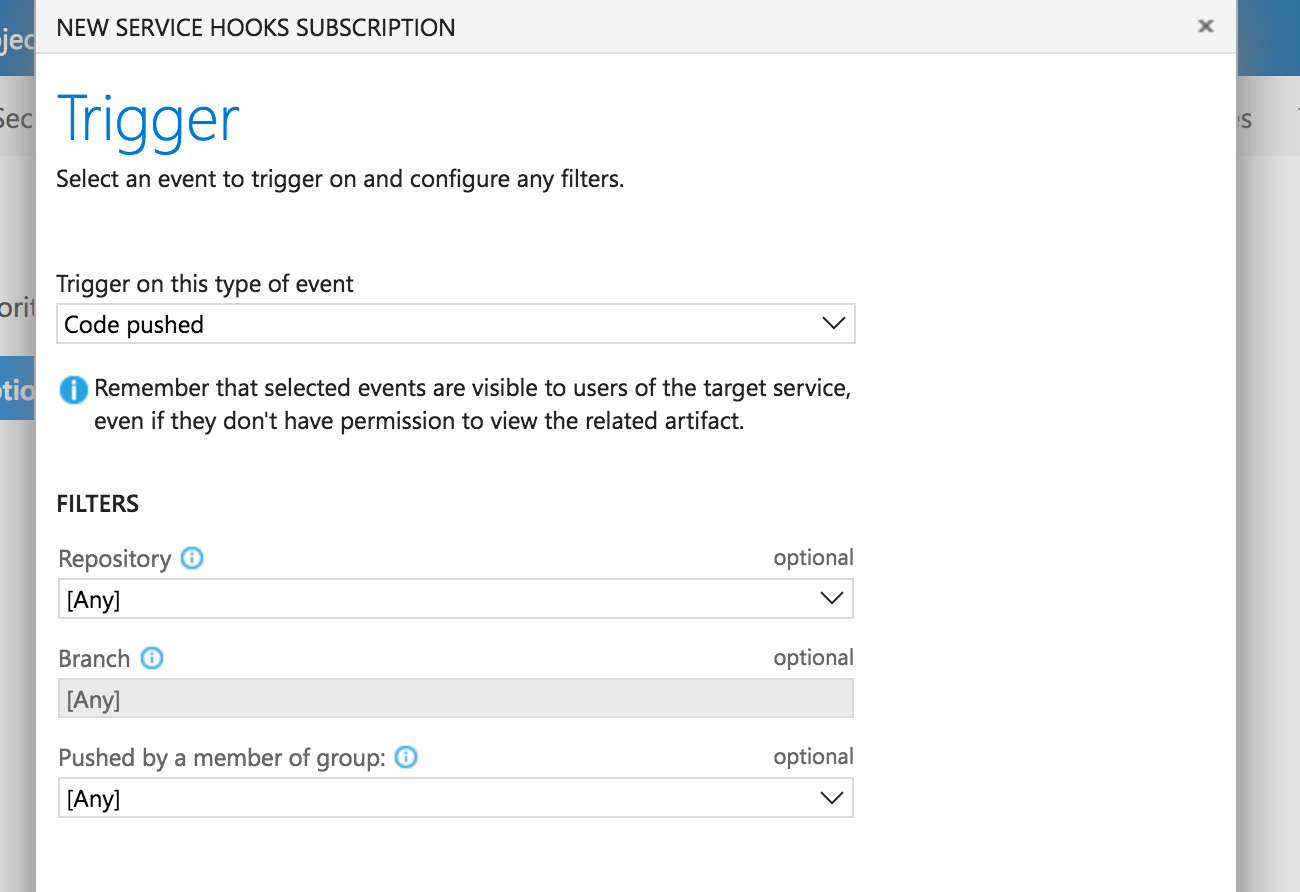
Simply add a service Web Hook to your VSTS project. In the “Settings” tab of your VSTS project, under the “Service Hook” section, click on “Create Subscription”.
Select “Web Hooks” in the list of service and click next. Select event of type “Code Pushed”. You can optionally filter which repositories and branch commits/changesets should be pushed to iceScrum.
On the next screen you are asked for connection parameters. The Web Hook URL is built this way:
$server/ws/project/$project/commit/vsts
- server: the URL of your iceScrum server. For iceScrum cloud instances it is
https://cloud.icescrum.com
- project: your iceScrum project ID or key
URL example for cloud project PEETIC :
https://cloud.icescrum.com/ws/project/PEETIC/commit/vsts
You will also need an iceScrum API access token. Learn to generate an iceScrum API token.
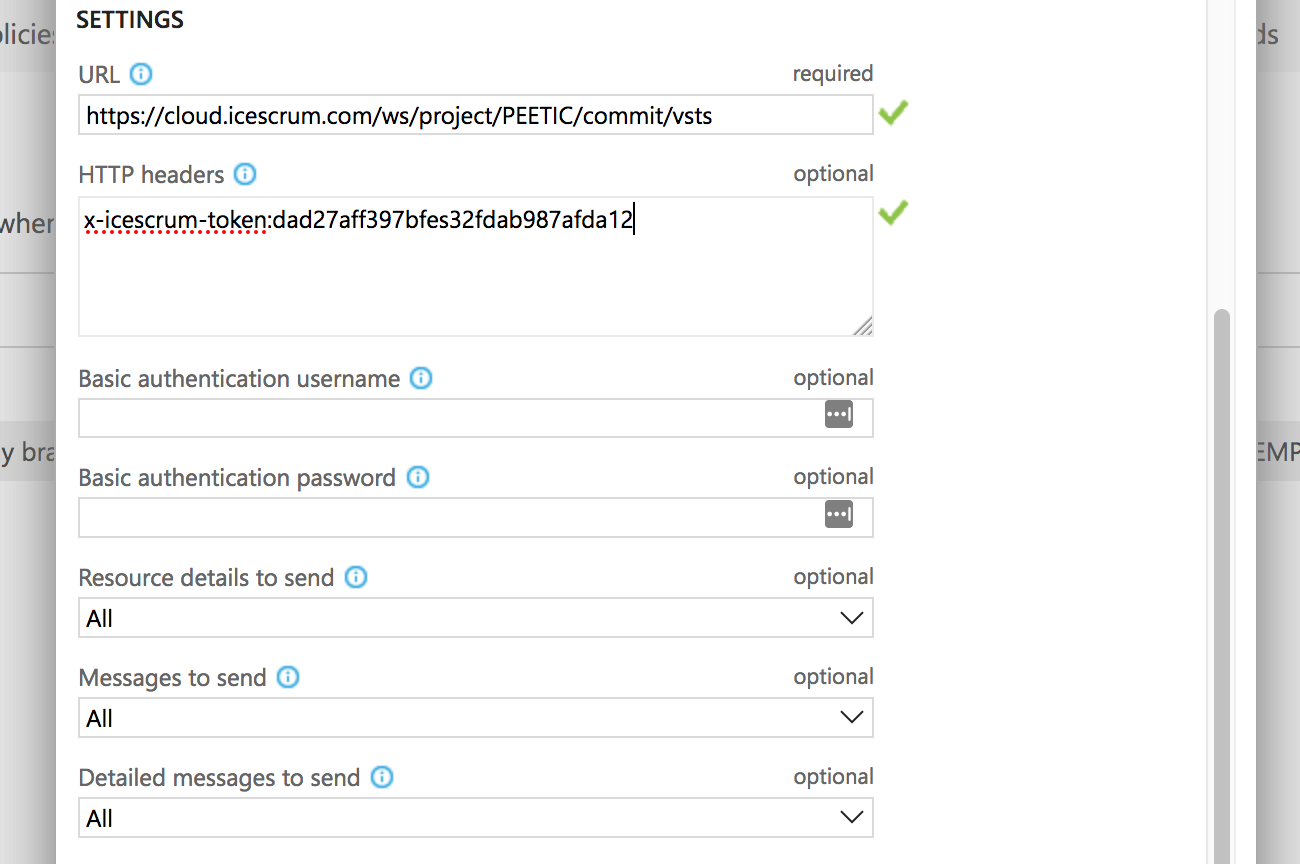
To connect a Visual Studio Team Services Repository to an iceScrum project, fill in the following fields:
- URL: the URL you just built.
- HTTP headers: x-icescrum-token:$access_token
- Basic authentication username: not used.
- Basic authentication password: not used.
- Resource details to send: All.
- Messages to send: All.
- Detailed messages to send: All.
- RESOURCE VERSION: 1.0.
Test, Save the Web Hook and that’s it.
The test request should return an HTTP 204 status response, because the test commit does not include any reference to an iceScrum task in its message.