Documentación Esta documentación se aplica solo a iceScrum v7.
Para el antiguo iceScrum R6, lea la documentación o migrate.
-
Instalar o Actualizar
-
Para empezar
-
Características principales
Apps & integraciones
Neatro
Companion
MURAL
Microsoft Teams
Discord
iObeya
Zoom
Google Hangouts Meet
Jamboard by Google
Miro
Jitsi Meet
Mattermost
Custom project dashboard
Agile KPIs
Webhooks
Forecast
Agile fortune
SAML Authentication
Labels
Share
Zapier
Story workflow
FeatureMap
Time tracking
Diagrams & mockups
Epic stories
Portfolio
Roadmap del proyecto
Toolbox
Autenticación externa
Integración continua
Almacenamiento en la nube
Capacidad del equipo
Bug trackers
LDAP / Active Directory
Slack
Administración de proyecto
User administration
Server administration
Git & SVN
Exportación de datos
Mood
Importación Excel
Responsable de tarea
Voto de historia
Plantilla de historia
Apps & integraciones
Pilas personalizadas
-
Migración
-


Mantenga un registro de los cambios de código al vincular sus commits con sus tareas e historias de usuario.
Principios
Esta función se divide en varias Apps dependiendo de su sistema de control de versiones. Es posible que también esté interesado en la función Integración continua.
Enlace commits y tareas
Primero, un ejemplo. Asumiendo que soy responsable de la tarea 18 en iceScrum llamada «Add car domain», una vez que el código está listo para enviar, escribo mi mensaje de confirmación:
New car domain class
Aquí es cómo relaciono este commit con la Tarea 18:
T18 New car domain class
El identificador T18 puede ubicarse en cualquier parte del mensaje de commit, por lo que es equivalente al mensaje de confirmación anterior:
New car T18 domain class
Una vez que se envía el commit, la información para esta confirmación se mostrará en los detalles de la Tarea 18 en una pestaña dedicada:
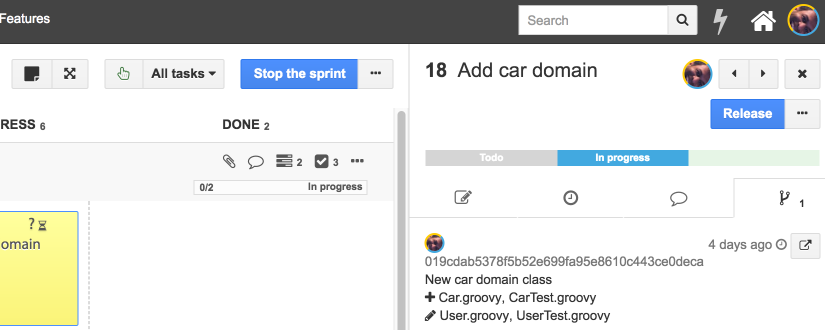
Para cada commit, se muestra esta información:
- Autor: si el autor del commit es reconocido en iceScrum (nombre de usuario, nombre completo, correo electrónico), la confirmación se asocia con el usuario iceScrum correspondiente.
- Mensaje: los identificadores de tareas se eliminan del mensaje original para hacerlo más legible.
- Fecha: la fecha de commit.
- Archivos: los archivos agregados, eliminados y modificados en su confirmación.
Puede hacer referencia a tantas tareas como necesite en su mensaje de commit:
New business object: supplier T21 T22 T23
Los commits se asocian a una tarea solo si su sprint está «En progreso».
Commits e historias
La vista de detalles de la historia también proporciona una pestaña de «Commits» que suma todos los commits de sus tareas.
Actualizar el tiempo restante de la tarea
Opcionalmente puede actualizar el tiempo restante de la tarea desde su mensaje de commit.
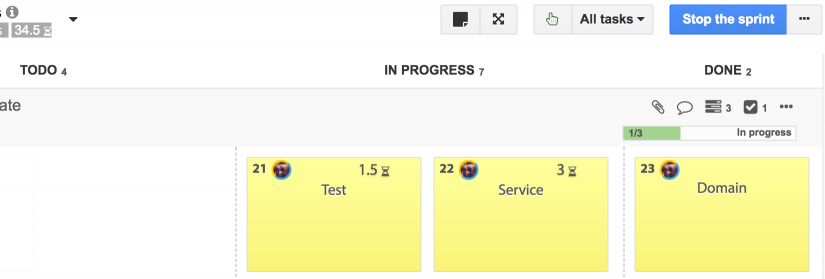
En este ejemplo, actualizo el tiempo restante de la tarea 21 a 1 hora y media, tarea 22 a 3 horas y no queda trabajo en la tarea 23, así que actualizo su tiempo restante a 0:
New business object: supplier T21-1.5 T22-3 T23-0
El tiempo restante se actualiza en consecuencia y la tarea 73 no tiene tiempo restante, por lo que se ha movido a «Terminada»:
Estas son las reglas de actualización:
- Si el nuevo tiempo restante es positivo y la tarea no está Terminada, el tiempo restante se actualiza en consecuencia.
- Si el nuevo tiempo restante no está especificado o es positivo y la tarea es «En espera», la tarea se mueve a «En progreso».
- Si el nuevo tiempo restante es 0, la tarea se mueve a «Terminada».
Link one code repository to multiple iceScrum projects
Starting from iceScrum 7.27, it is possible to link commits from one repository to several iceScrum projects.
This documentation illustrates mainly the simple case where there is only one project and the project is provided once for all through the URL configured to communicate with iceScrum. Thus, for multiple projects the first step consists in leaving out this project part (i.e. /project/$project) from the URL in all the examples provided in this documentation.
If you use the provided Git or SVN scripts then you will have to edit the code manually in order to build an URL that leaves out this part. Otherwise, just adapt the URL you enter.
E.g. for Gitlab, instead of:
/ws/project/MYPROJECTKEY/commit/gitlab
Use:
/ws/commit/gitlab
However, iceScrum still needs to know which project to attach a commit to. Thus, all task tags should be prefixed by the project key of the project they belong to:
New car MYPROJECTKEY-T18 domain class
Git
Primero, habilite la App Git en su proyecto.
Para conectar su repositorio de Git al proyecto IceScrum correspondiente, debe agregar un script de post-recepción en el directorio YOUR-REPO/.git/hooks/.
Puede escribir su propio script, pero le recomendamos usar este: post-receive. Este script se engancha en hooks recibidos por un repositorio de Git.
Requiere Ruby y Rubygems (gemas grit y json):
$ sudo apt-get install ruby-full
$ sudo apt-get install rubygems
$ sudo gem install grit
$ sudo gem install json
Dale permisos de ejecución:
$ chmod +x post-receive
Luego, configure la conexión a iceScrum usando el comando git config en su repositorio:
$ git config icescrum.url "http://www.example.com/icescrum/"
$ git config icescrum.project "MYFIRSTPROJ"
$ git config icescrum.accesstoken "changeto112323435yourtoken"
Aprende cómo generar un token iceScrum API.
Puede configurar de manera óptima la URL de Git si utiliza una herramienta basada en la web:
$ git config icescrum.giturl "http://localhost:3546/gitweb/"
Este ejemplo establece la configuración solo para el repositorio actual (las configuraciones se escriben en el archivo .git/config). Si desea aplicarlos a todos los repositorios del usuario actual, utilice la opción global (la configuración global está escrita en el archivo ~/.gitconfig).
SVN
Primero, habilite la App SVN en su proyecto iceScrum.
Para conectar su repositorio SVN al proyecto iceScrum correspondiente, debe agregar un script post-commit en su servidor, en el directorio YOUR-REPO/hooks/.
Puede escribir su propio script, pero le recomendamos utilizar este: post-commit.
Este script requiere Ruby y un Rubygem (json):
$ sudo apt-get install ruby-full
$ sudo apt-get install rubygems
$ sudo gem install json
Dale permisos de ejecución:
$ chmod +x post-commit
Luego, configure el acceso a iceScrum editando el script:
icescrum_url = "http://www.example.com/icescrum/"
pkey = "MYFIRSTPROJ"
access_token = "changeto112323435yourtoken"
Aprende cómo generar un token iceScrum API.
Opcionalmente puede configurar la URL de SVN si usa una herramienta basada en web:
svnviewer_url = "http://svnviewer/svn-history/"
GitHub
Primero, habilite la App GitHub en su proyecto iceScrum.
Aviso: el servicio integrado de GitHub para iceScrum solo es compatible con iceScrum R6. Para la integración entre GitHub e iceScrum v7, simplemente agregue un webhook a su repositorio GitHub como se describe a continuación.
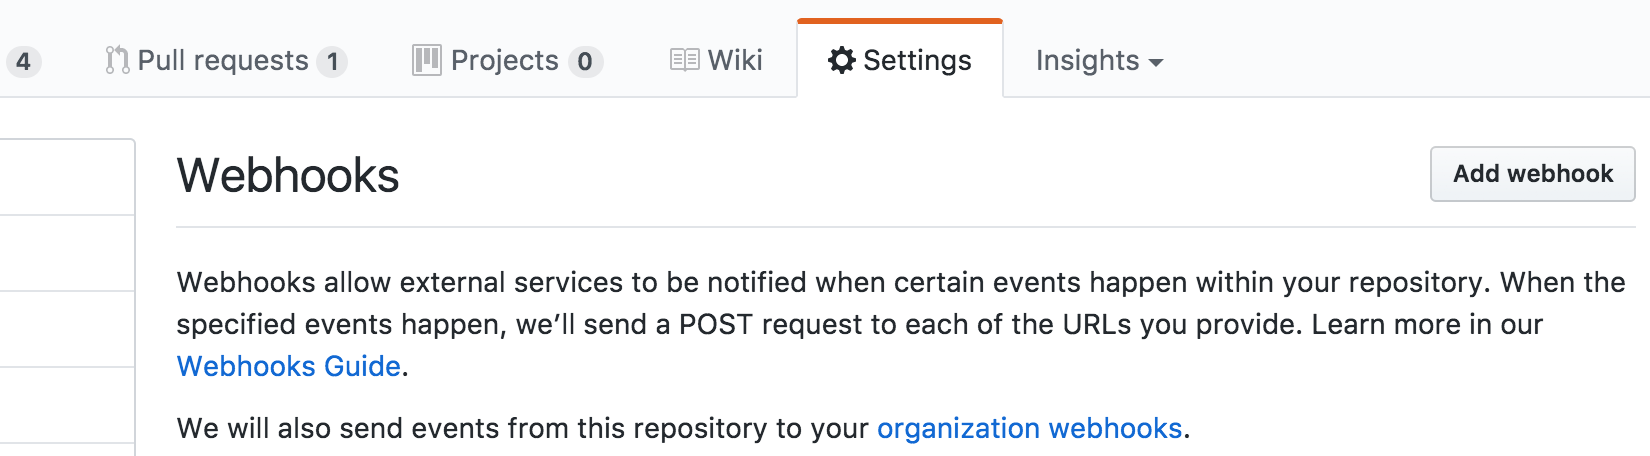
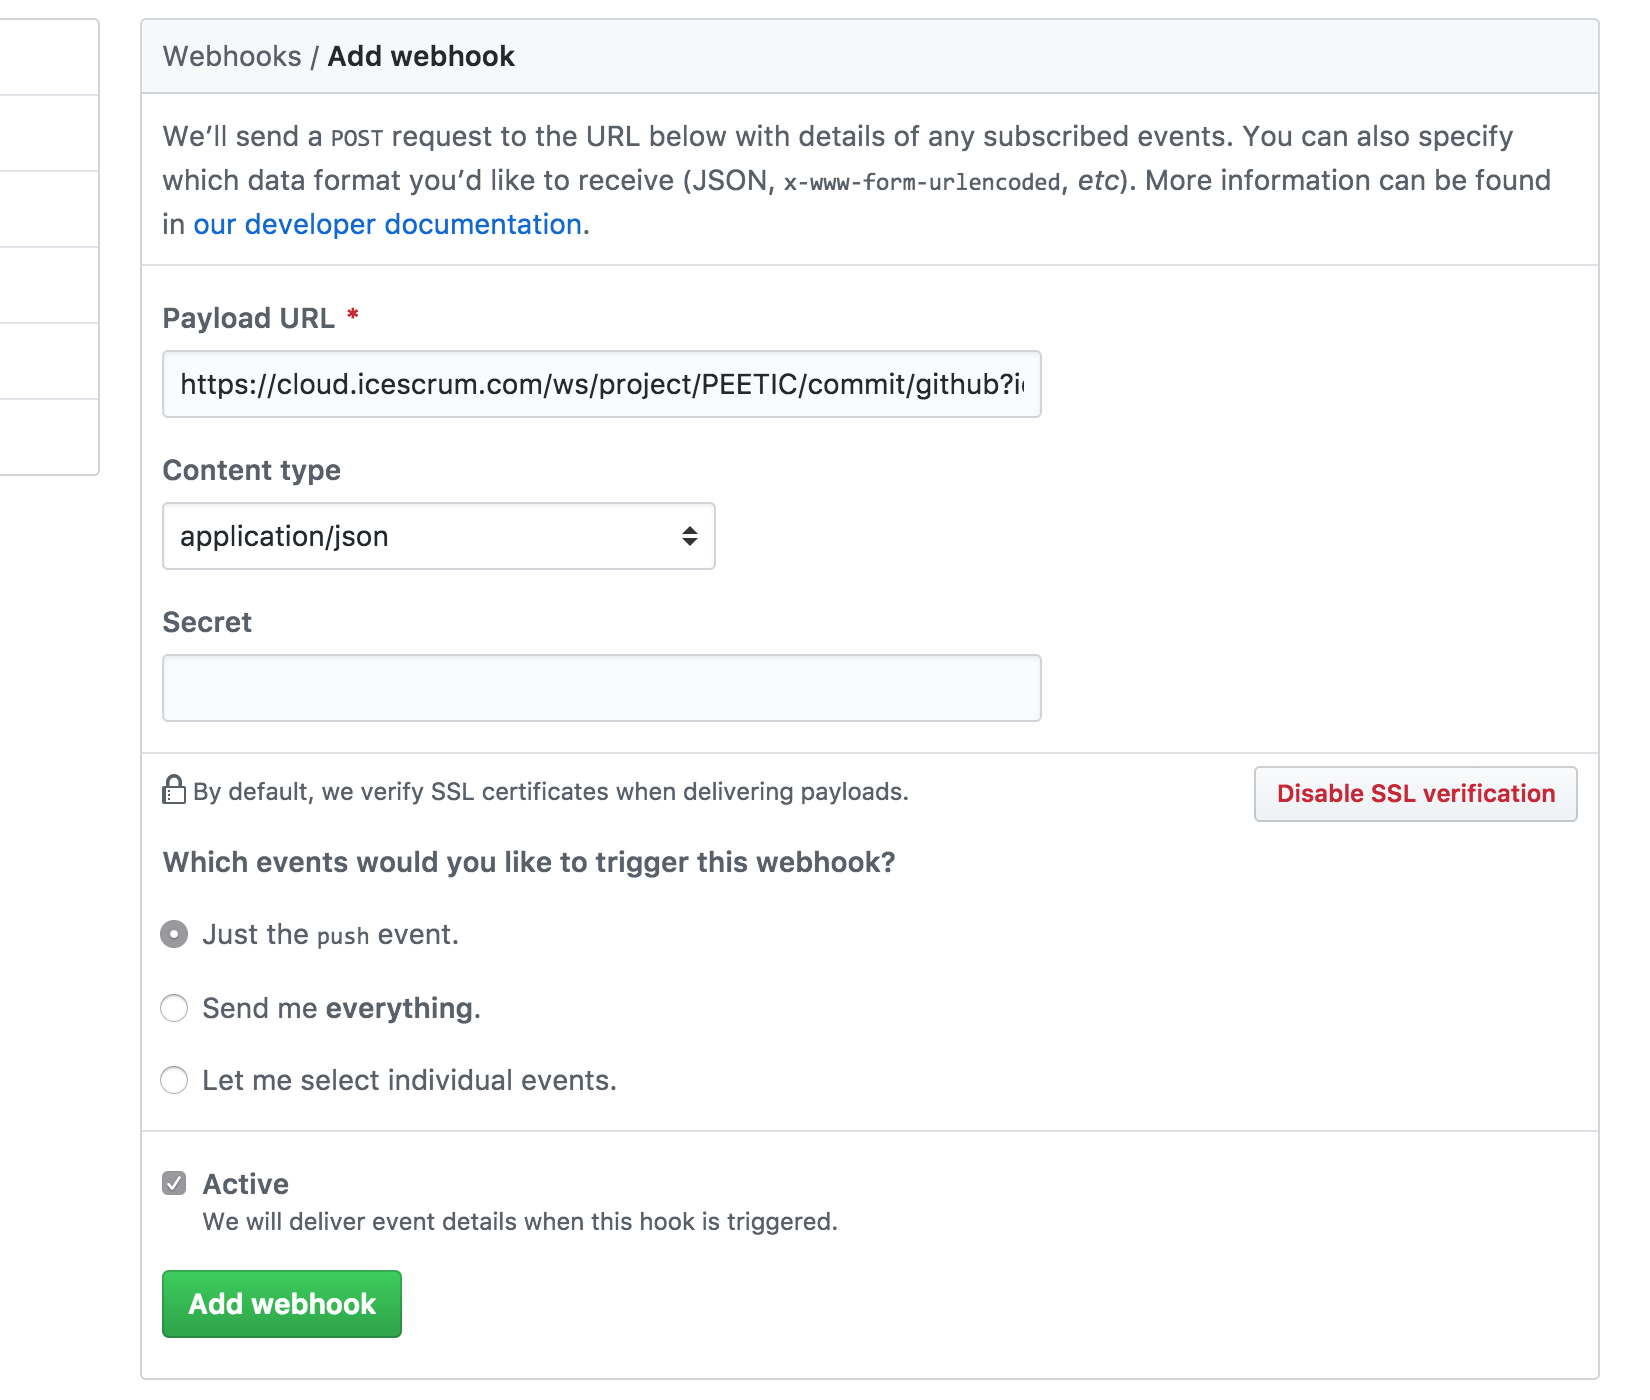
Agregue un webhook a su repositorio de GitHub. En la pestaña «Configuración» de su repositorio GitHub, en la sección «Webhooks», haga clic en «Agregar webhook».
La URL de carga útil está construida de esta manera:
$server/ws/project/$project/commit/github?icescrum-token=$access_token
- servidor: la URL de su servidor iceScrum. Para las instancias de iceScrum Cloud es
https://cloud.icescrum.com
- proyecto: su ID o clave de proyecto iceScrum
- access_token: token de acceso iceScrum API. Aprende cómo generar un token iceScrum API.
Ejemplo de URL de carga útil para el proyecto Cloud PEETIC:
https://cloud.icescrum.com/ws/project/PEETIC/commit/github?icescrum-token=dad27aff397bfes32fdab987
Para conectar un repositorio GitHub a un proyecto iceScrum, complete los siguientes campos:
- Payload URL: la URL que acaba de crear.
- Content type: application/json.
- Triggers: solo el evento push.
- Active: sorprendentemente, el enlace web solo está activo si se marca «active».
GitLab
Primero, habilite la App GitLab en su proyecto.
Luego, tendrás que crear un GitLab activado en los eventos push: https://docs.gitlab.com/ee/user/project/integrations/webhooks.html.
Suponiendo que tiene un proyecto con la clave MYPROJECTKEY, la URL del punto final es la URL de su servidor iceScrum seguido de:
/ws/project/MYPROJECTKEY/commit/gitlab
He aquí un ejemplo de la URL a configurar si utiliza iceScrum Cloud:
https://cloud.icescrum.com/ws/project/MYPROJECTKEY/commit/gitlab
A partir de iceScrum 7.42, debe proporcionar su token iceScrum en la cabecera X-Gitlab-Token. El token debe haber sido generado por un usuario de iceScrum que tiene acceso al proyecto.
Visual Studio Team Services
- VSTS work items: Create iceScrum stories from VSTS work items.
- VSTS CI: Link VSTS builds to iceScrum.
- VSTS code: Link VSTS commits to iceScrum tasks.
You can link commits/changesets in Visual Studio Team Service to your tasks and stories in iceScrum. It works both for Git and Team Foundation Version Control.
There are 2 ways to configure your Visual Studio Team Service environment. The preferred way is to use the iceScrum extension.
with iceScrum extension
First install the iceScrum extension for Visual Studio Team Services.
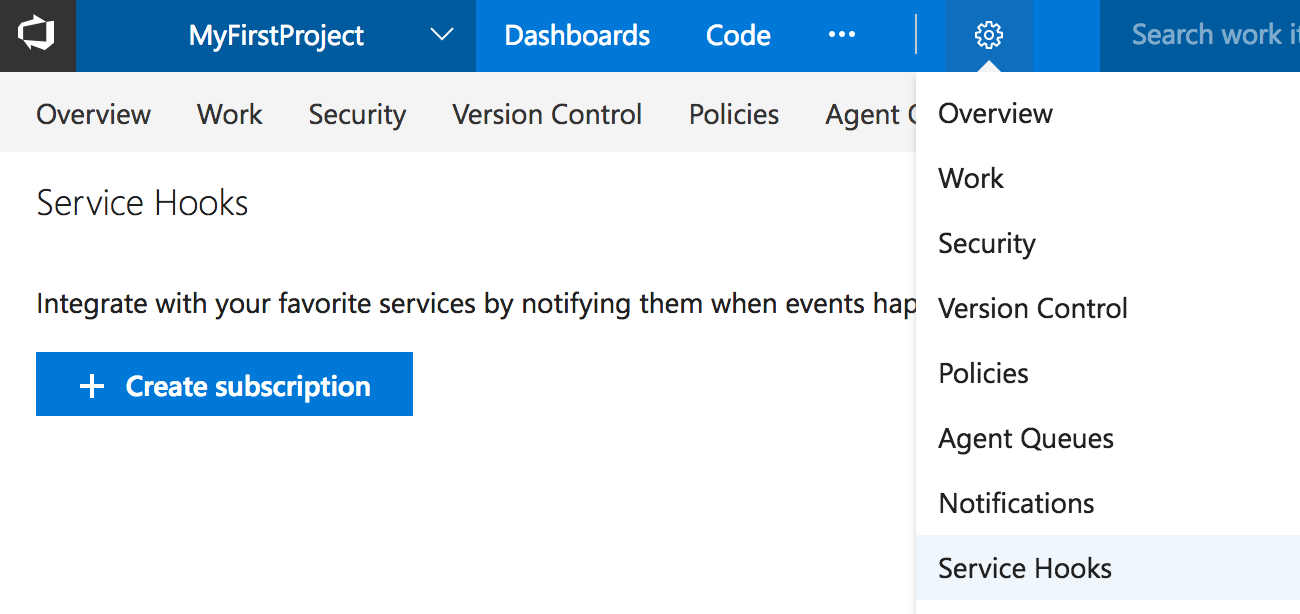
Simply add a Service Hook to your VSTS project. In the Settings tab of your VSTS project, under the Service Hook section, click on Create Subscription.
Select iceScrum in the list of service and click next.
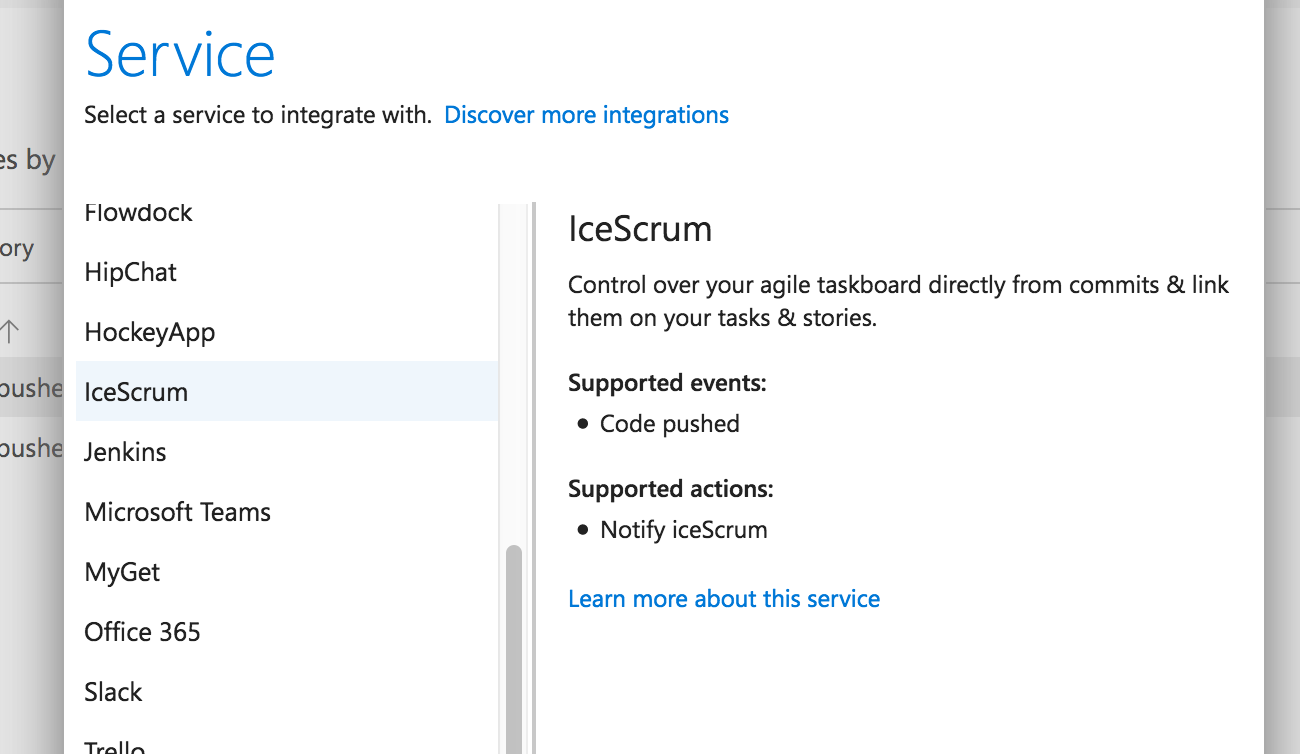
You can optionally filter which repositories and branch commits/changesets should be pushed to iceScrum.

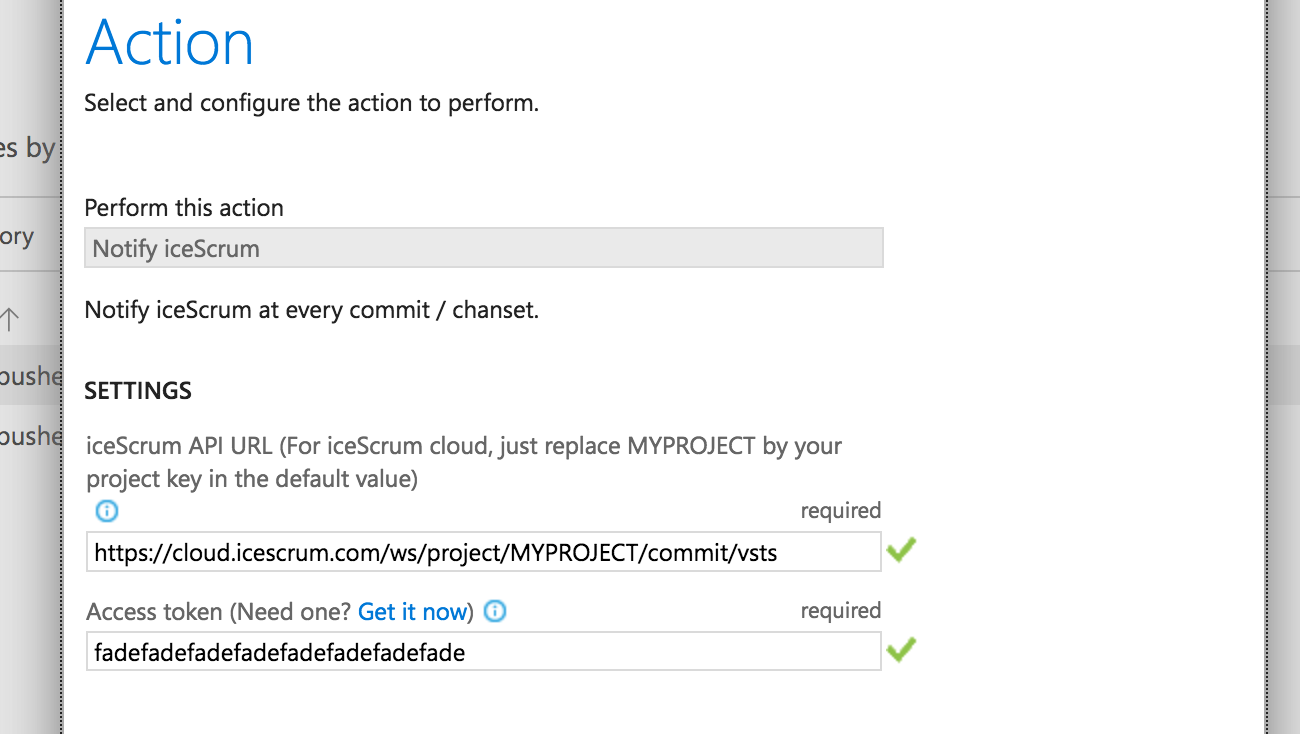
On the next screen you are asked for connection settings. The iceScrum API URL is built this way:
$server/ws/project/$project/commit/vsts
- server: the URL of your iceScrum server. For iceScrum cloud instances it is
https://cloud.icescrum.com
- project: your iceScrum project ID or key
URL example for cloud project PEETIC :
https://cloud.icescrum.com/ws/project/PEETIC/commit/vsts
You will also need an iceScrum API access token. Learn to generate an iceScrum API token.
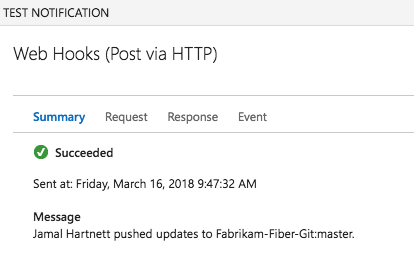
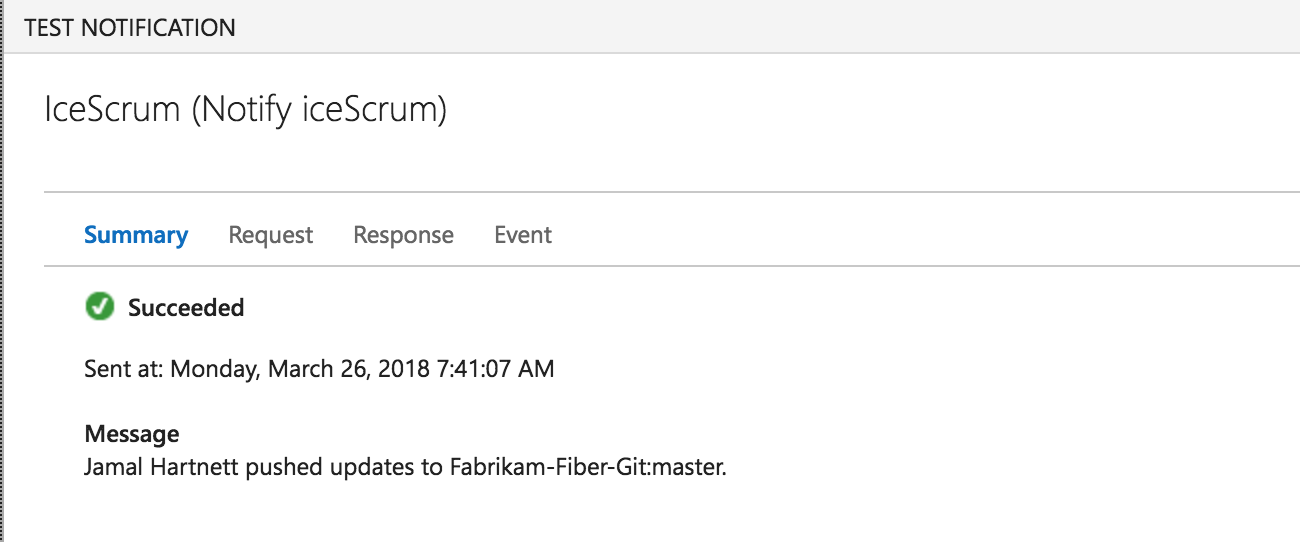
Test, save the Web Hook and that’s it.
The test request should return an HTTP 204 status response, because the test commit does not include any reference to an iceScrum task in its message.
with a service web hook
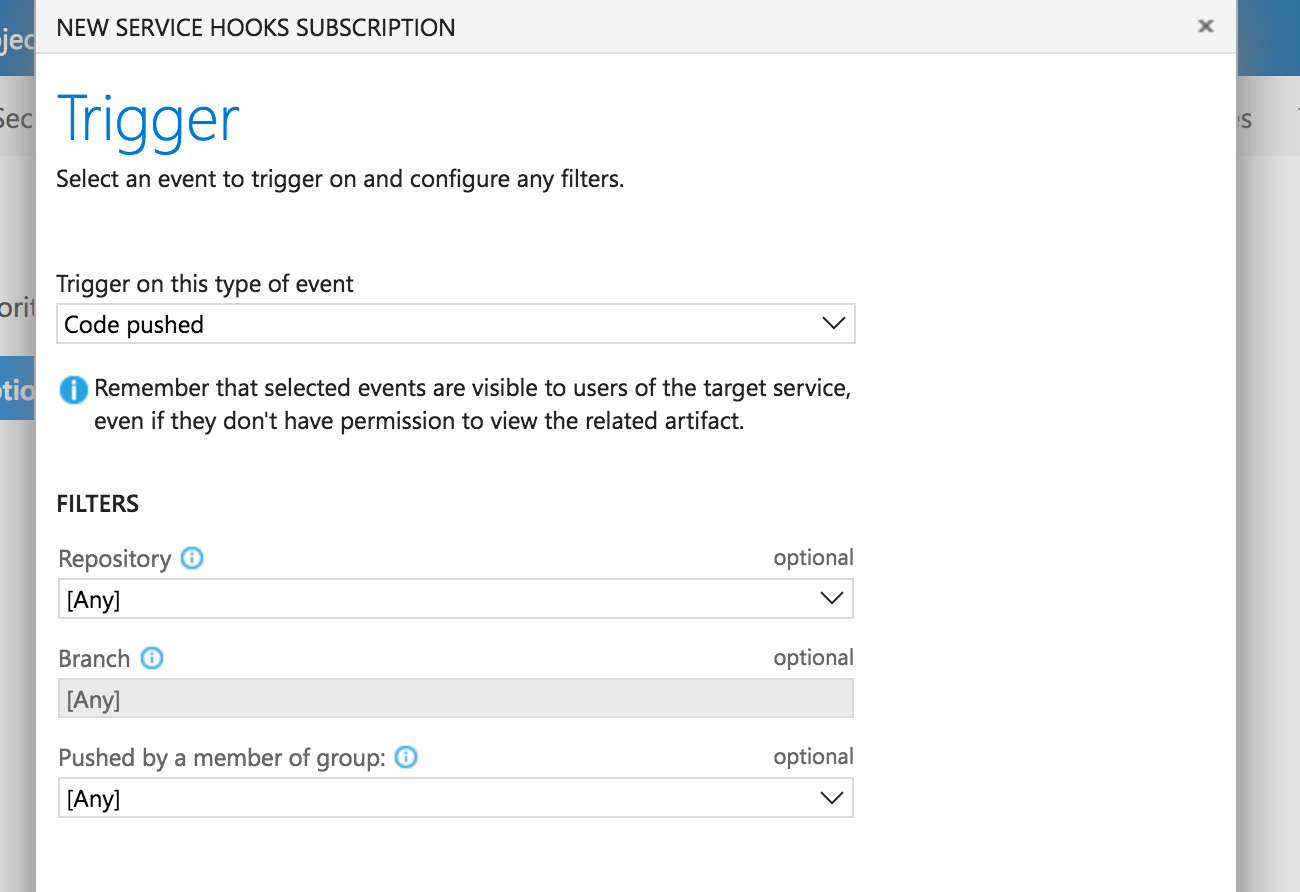
Simply add a service Web Hook to your VSTS project. In the «Settings» tab of your VSTS project, under the «Service Hook» section, click on «Create Subscription».
Select «Web Hooks» in the list of service and click next. Select event of type «Code Pushed». You can optionally filter which repositories and branch commits/changesets should be pushed to iceScrum.
On the next screen you are asked for connection parameters. The Web Hook URL is built this way:
$server/ws/project/$project/commit/vsts
- server: the URL of your iceScrum server. For iceScrum cloud instances it is
https://cloud.icescrum.com
- project: your iceScrum project ID or key
URL example for cloud project PEETIC :
https://cloud.icescrum.com/ws/project/PEETIC/commit/vsts
You will also need an iceScrum API access token. Learn to generate an iceScrum API token.
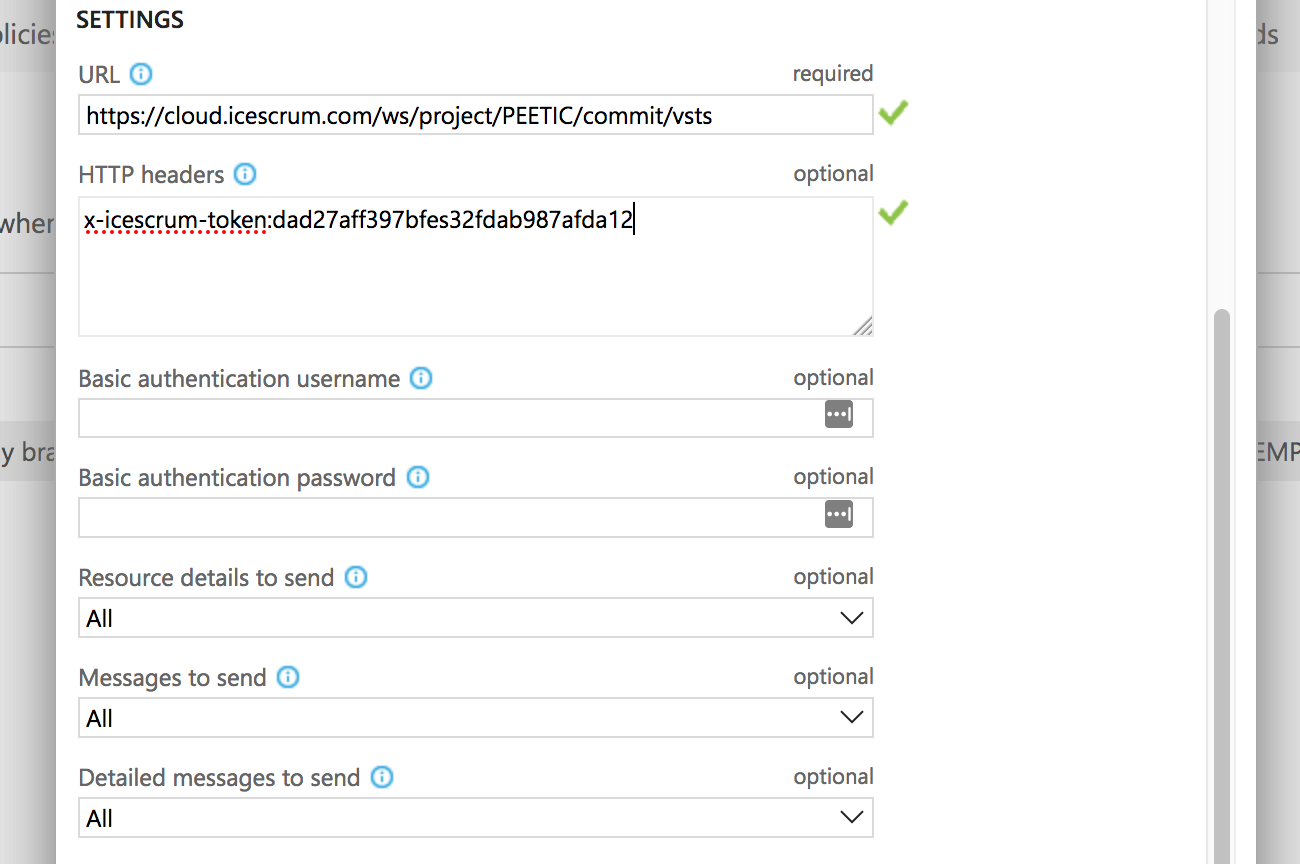
To connect a Visual Studio Team Services Repository to an iceScrum project, fill in the following fields:
- URL: the URL you just built.
- HTTP headers: x-icescrum-token:$access_token
- Basic authentication username: not used.
- Basic authentication password: not used.
- Resource details to send: All.
- Messages to send: All.
- Detailed messages to send: All.
- RESOURCE VERSION: 1.0.
Test, Save the Web Hook and that’s it.
The test request should return an HTTP 204 status response, because the test commit does not include any reference to an iceScrum task in its message.