Documentación Esta documentación se aplica solo a iceScrum v7.
Para el antiguo iceScrum R6, lea la documentación o migrate.
-
Instalar o Actualizar
-
Para empezar
-
Características principales
Apps & integraciones
Neatro
Companion
MURAL
Microsoft Teams
Discord
iObeya
Zoom
Google Hangouts Meet
Jamboard by Google
Miro
Jitsi Meet
Mattermost
Custom project dashboard
Agile KPIs
Webhooks
Forecast
Agile fortune
SAML Authentication
Labels
Share
Zapier
Story workflow
FeatureMap
Time tracking
Diagrams & mockups
Epic stories
Portfolio
Roadmap del proyecto
Toolbox
Autenticación externa
Integración continua
Almacenamiento en la nube
Capacidad del equipo
Bug trackers
LDAP / Active Directory
Slack
Administración de proyecto
User administration
Server administration
Git & SVN
Exportación de datos
Mood
Importación Excel
Responsable de tarea
Voto de historia
Plantilla de historia
Apps & integraciones
Pilas personalizadas
-
Migración
-


Authenticate your users using SAML.
Principles
Unlike most Apps, this App is server-wide. That means that it cannot be used on iceScrum Cloud. Otherwise, if your license includes it, then it will available automatically.
There are two types of users in iceScrum, depending on their authentication mode:
- Internal: regular iceScrum users. They are authenticated only according to their user / password registered in iceScrum. Users created through the register form or from the user administration panel are internal by default.
- External: users that can authenticate only through an external service such as SAML or LDAP. If the external authentication fails, they can’t log in. When a new user successfully logs in into iceScrum for the first time through the external service, the corresponding iceScrum external user is created from their attributes: username, first name, last name and email address. Consequently, there is no need for the administrator to create them manually. Their email address and their password cannot be modified from iceScrum.
Permissions for external users are managed through the usual iceScrum team wizard, they cannot be managed from the external service.
Each time an external user logs in successfully, its iceScrum attributes are updated from their external attributes.
Note that iceScrum never writes in your external service and that external passwords are never stored in iceScrum.
User type (internal / external) can be changed by the administrator at any time. This can be used to migrate an existing internal user base to an external authentication service. Refer to the user administration documentation for more information.
Configuration
You need to log in as administrator in order to configure the SAML support. You will find the SAML settings in the «Settings» menu.
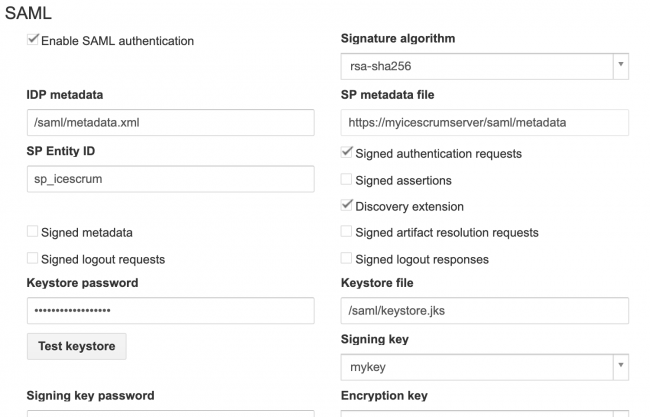
- Enable: Enable SAML authentication
- First name attribute: SAML first name attribute name used to create local iceScrum user (required)
- Last name attribute: SAML last name attribute name used to create local iceScrum user (required)
- Email attribute: SAML email attribute name used to create local iceScrum user (required)
- Language attribute: SAML language attribute name used to create local iceScrum user (required)
- Username attribute: SAML username attribute name used to create local iceScrum user (required)
- Keystore file: Location of the keystore, this could be a classpath (for example, classpath:security/keystore.jks) or it could be a absolute location on the machine (for example, file:c://temp/keystore.jks or file:/home/u02/keystore.jks).
- Keystore password: Password to access to the keystore file.
- IDP metadata: Location of the identity provider file (file path or url).
- Signature algorithm: Type of Signature algorithm.
- SP Entity ID: Unique identifier of the service provider.
- Signed authentication requests: Flag indicating whether this service signs authentication requests.
- Signed assertions: Flag indicating whether this service requires signed assertions.
- Discovery extension: When true generated metadata will contain extension indicating that it’s able to consume response from an IDP Discovery service.
- Signed metadata: When true generated metadata will be signed using XML Signature using certificate with alias of signingKey.
- Signed artifact resolution requests: Enables signing of artifact resolution requests sent to the remote identity providers.
- Signed logout requests: For local entities enables requirement of signed logout requests. For remote entities enables signing of requests sent to the IDP.
- Signed logout responses: For local entities enables requirement of signed logout responses. For remote entities enables signing of responses sent to the IDP.
- Signing key: For local entities alias of private key used to create signatures. The default private key is used when no value is provided. For remote identity providers defines an additional public key used to verify signatures.
- Signing key password: Password for the Encryption Key
- Encryption key: For local entities alias of private key used to encrypt data. The default private key is used when no value is provided. For remote identity providers defines an additional public key used to decrypt data.
- Encryption key password: Password for the Encryption Key
- TLS key: For local entities alias of private key used for SSL/TLS client authentication. No client authentication is used when value is not specified. For remote identity providers defines an additional public key used for trust resolution.
- TLS key password: Password for the TLS Key
A restart is needed in order for these settings to be taken into account.
Azure AD SAML Tutorial (ADFS)
On your iceScrum server:
- Generate a new Java KeyStore using this command:
keytool -genkey -alias icescrum_saml -keyalg RSA -keystore icescrum_saml.keystore
A password/passphrase for the new KeyStore file. This command will prompt for the following values:
- Re-enter the same password to confirm.
- Private Key identifying attributes such as Company name, Organization name, etc.
- Copy path where you created the KeyStore
As an iceScrum admin:
- Go on iceScrum server settings page
- Enable SAML authentication
- Edit the following SAML configuration values:
- Signature algorithm: Choose RSA-SHA256
- Keystore file: Paste the KeyStore path created earlier
- Keystore password: Put the KeyStore password created earlier
- Click on test Keystore, to check if it is correct
- Signing key, Encryption key, TLS key: choose the key alias icescrum_saml created earlier
- Signing key password, Encryption key password, TLS Key password: put the password choose for the private key created earlier
- SP Entity ID: Put sp_icescrum for example
- Save your settings
- Click on SP metadata file to copy url & download the metadata file
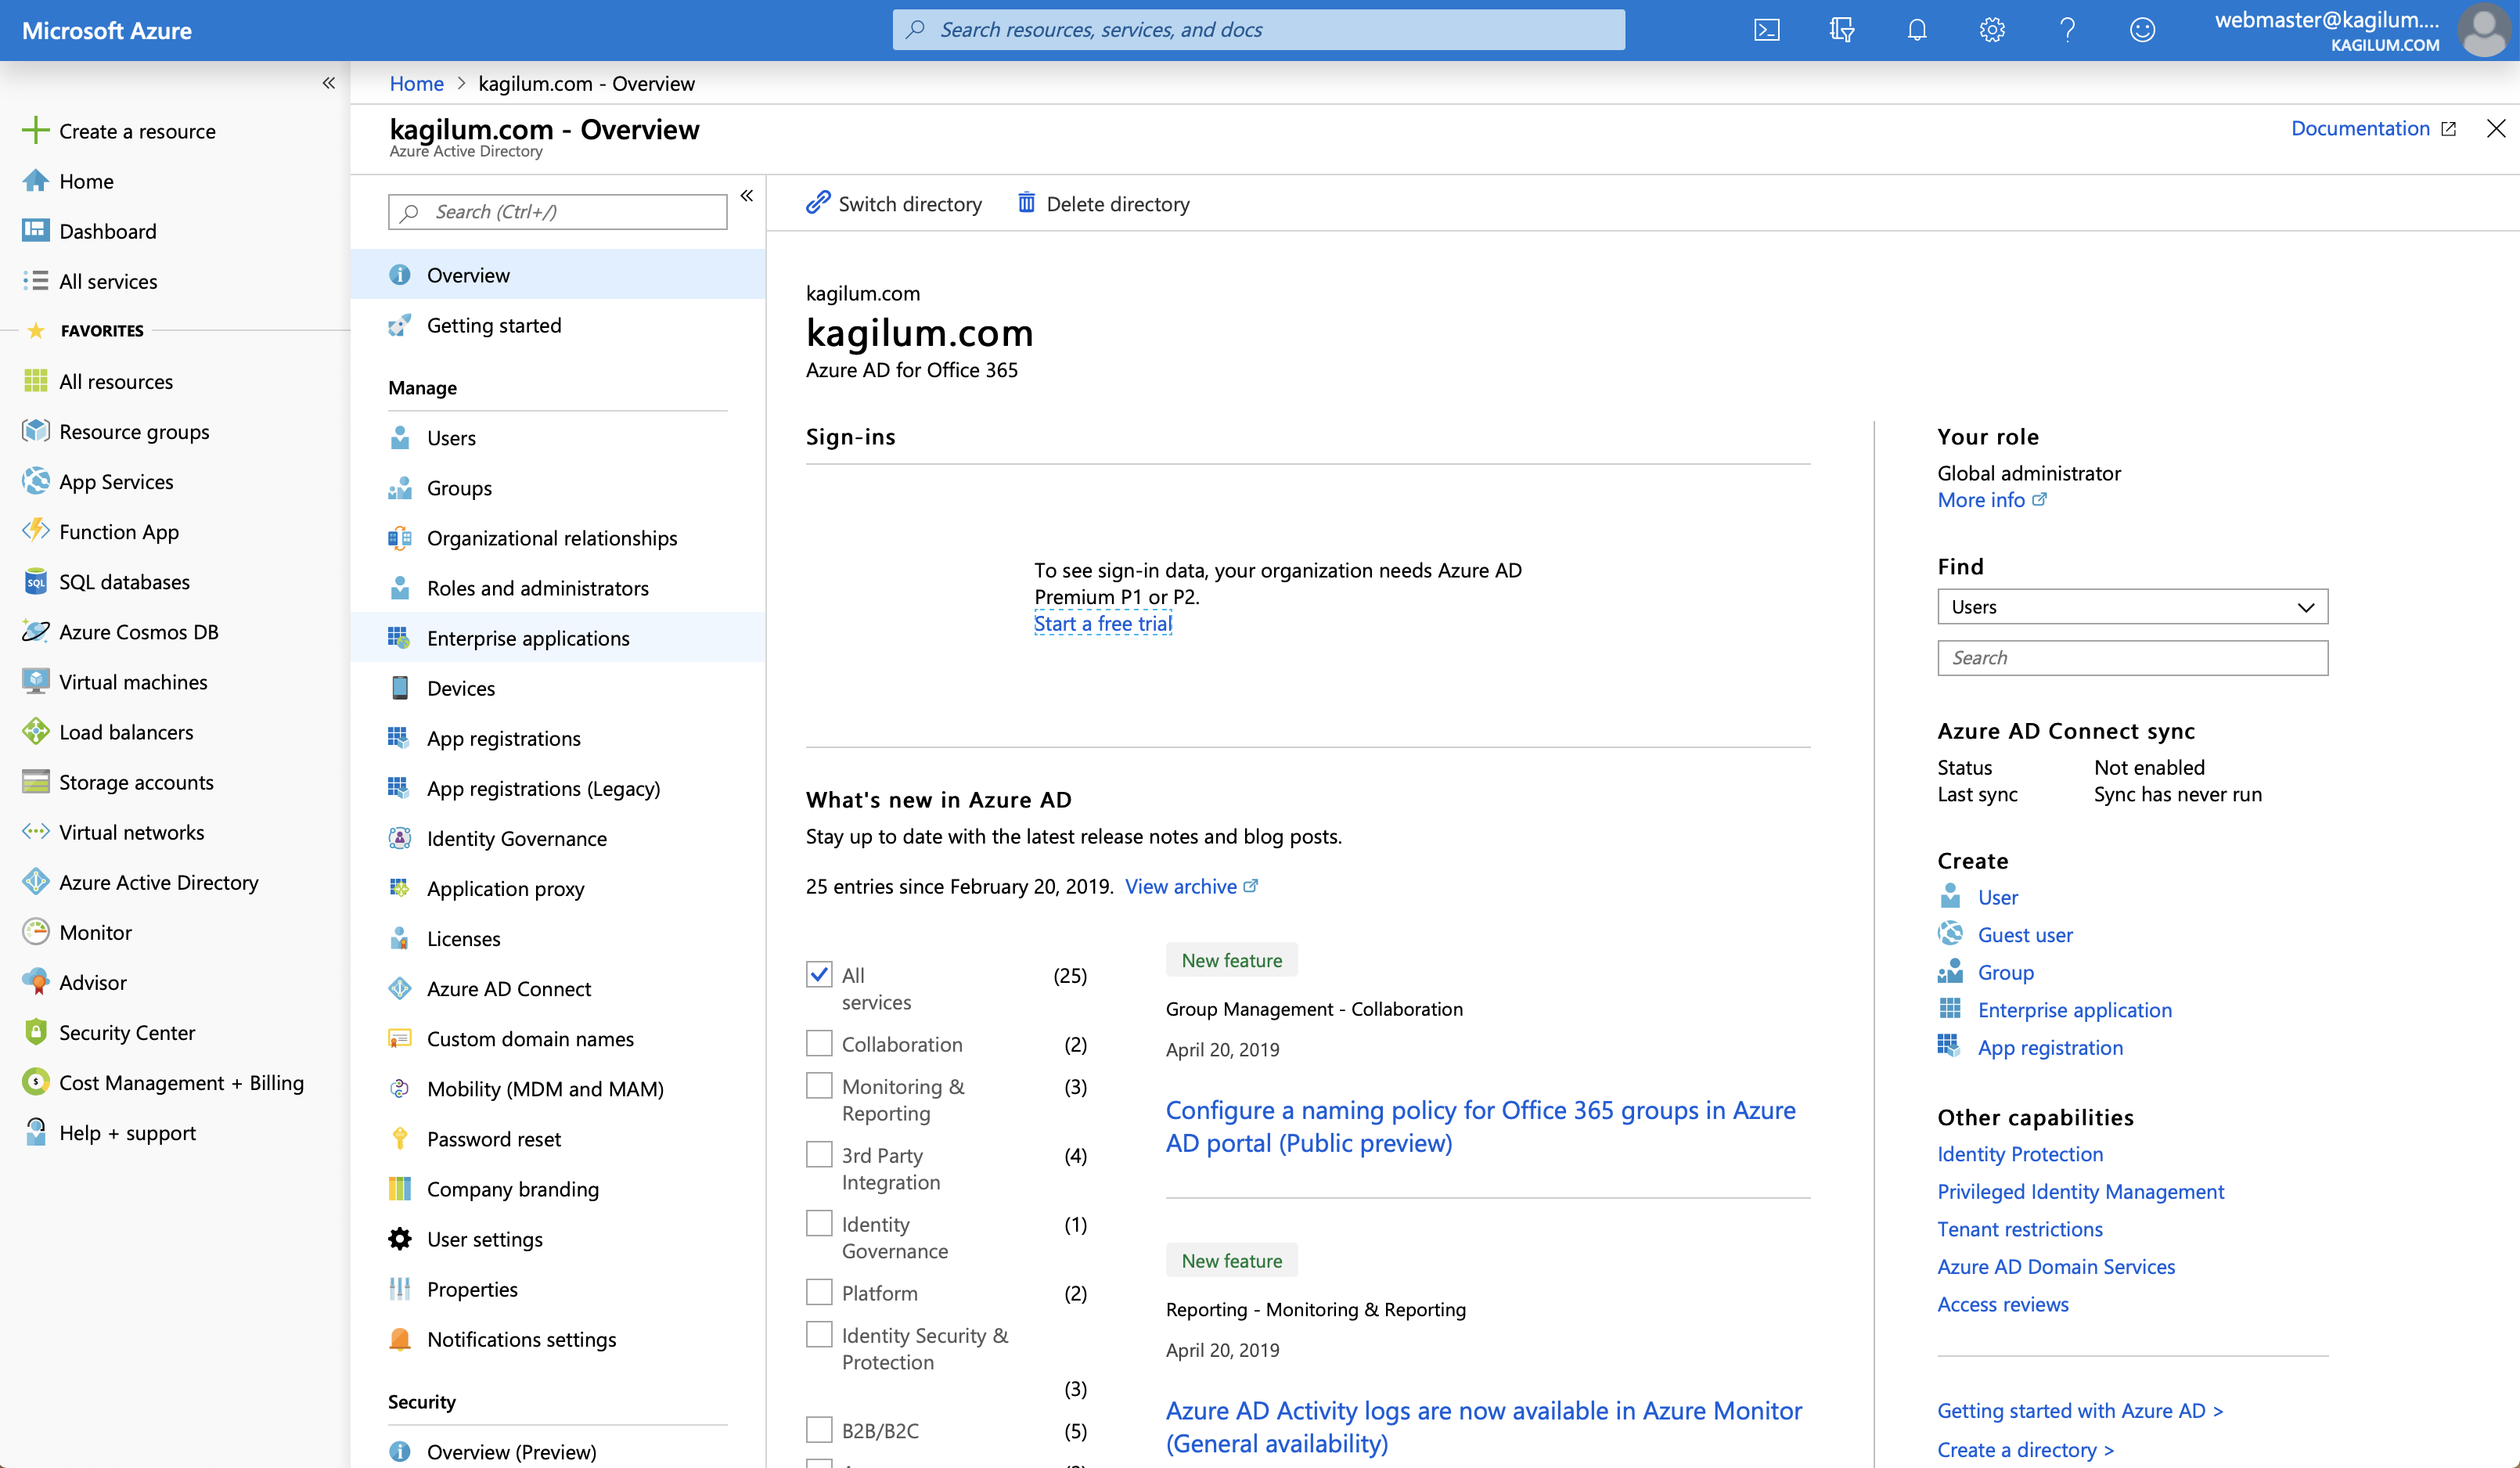
As an Azure admin:
- Go on your Azure portal (https://portal.azure.com/#home)
- Click on Azure Active Directory
![]()
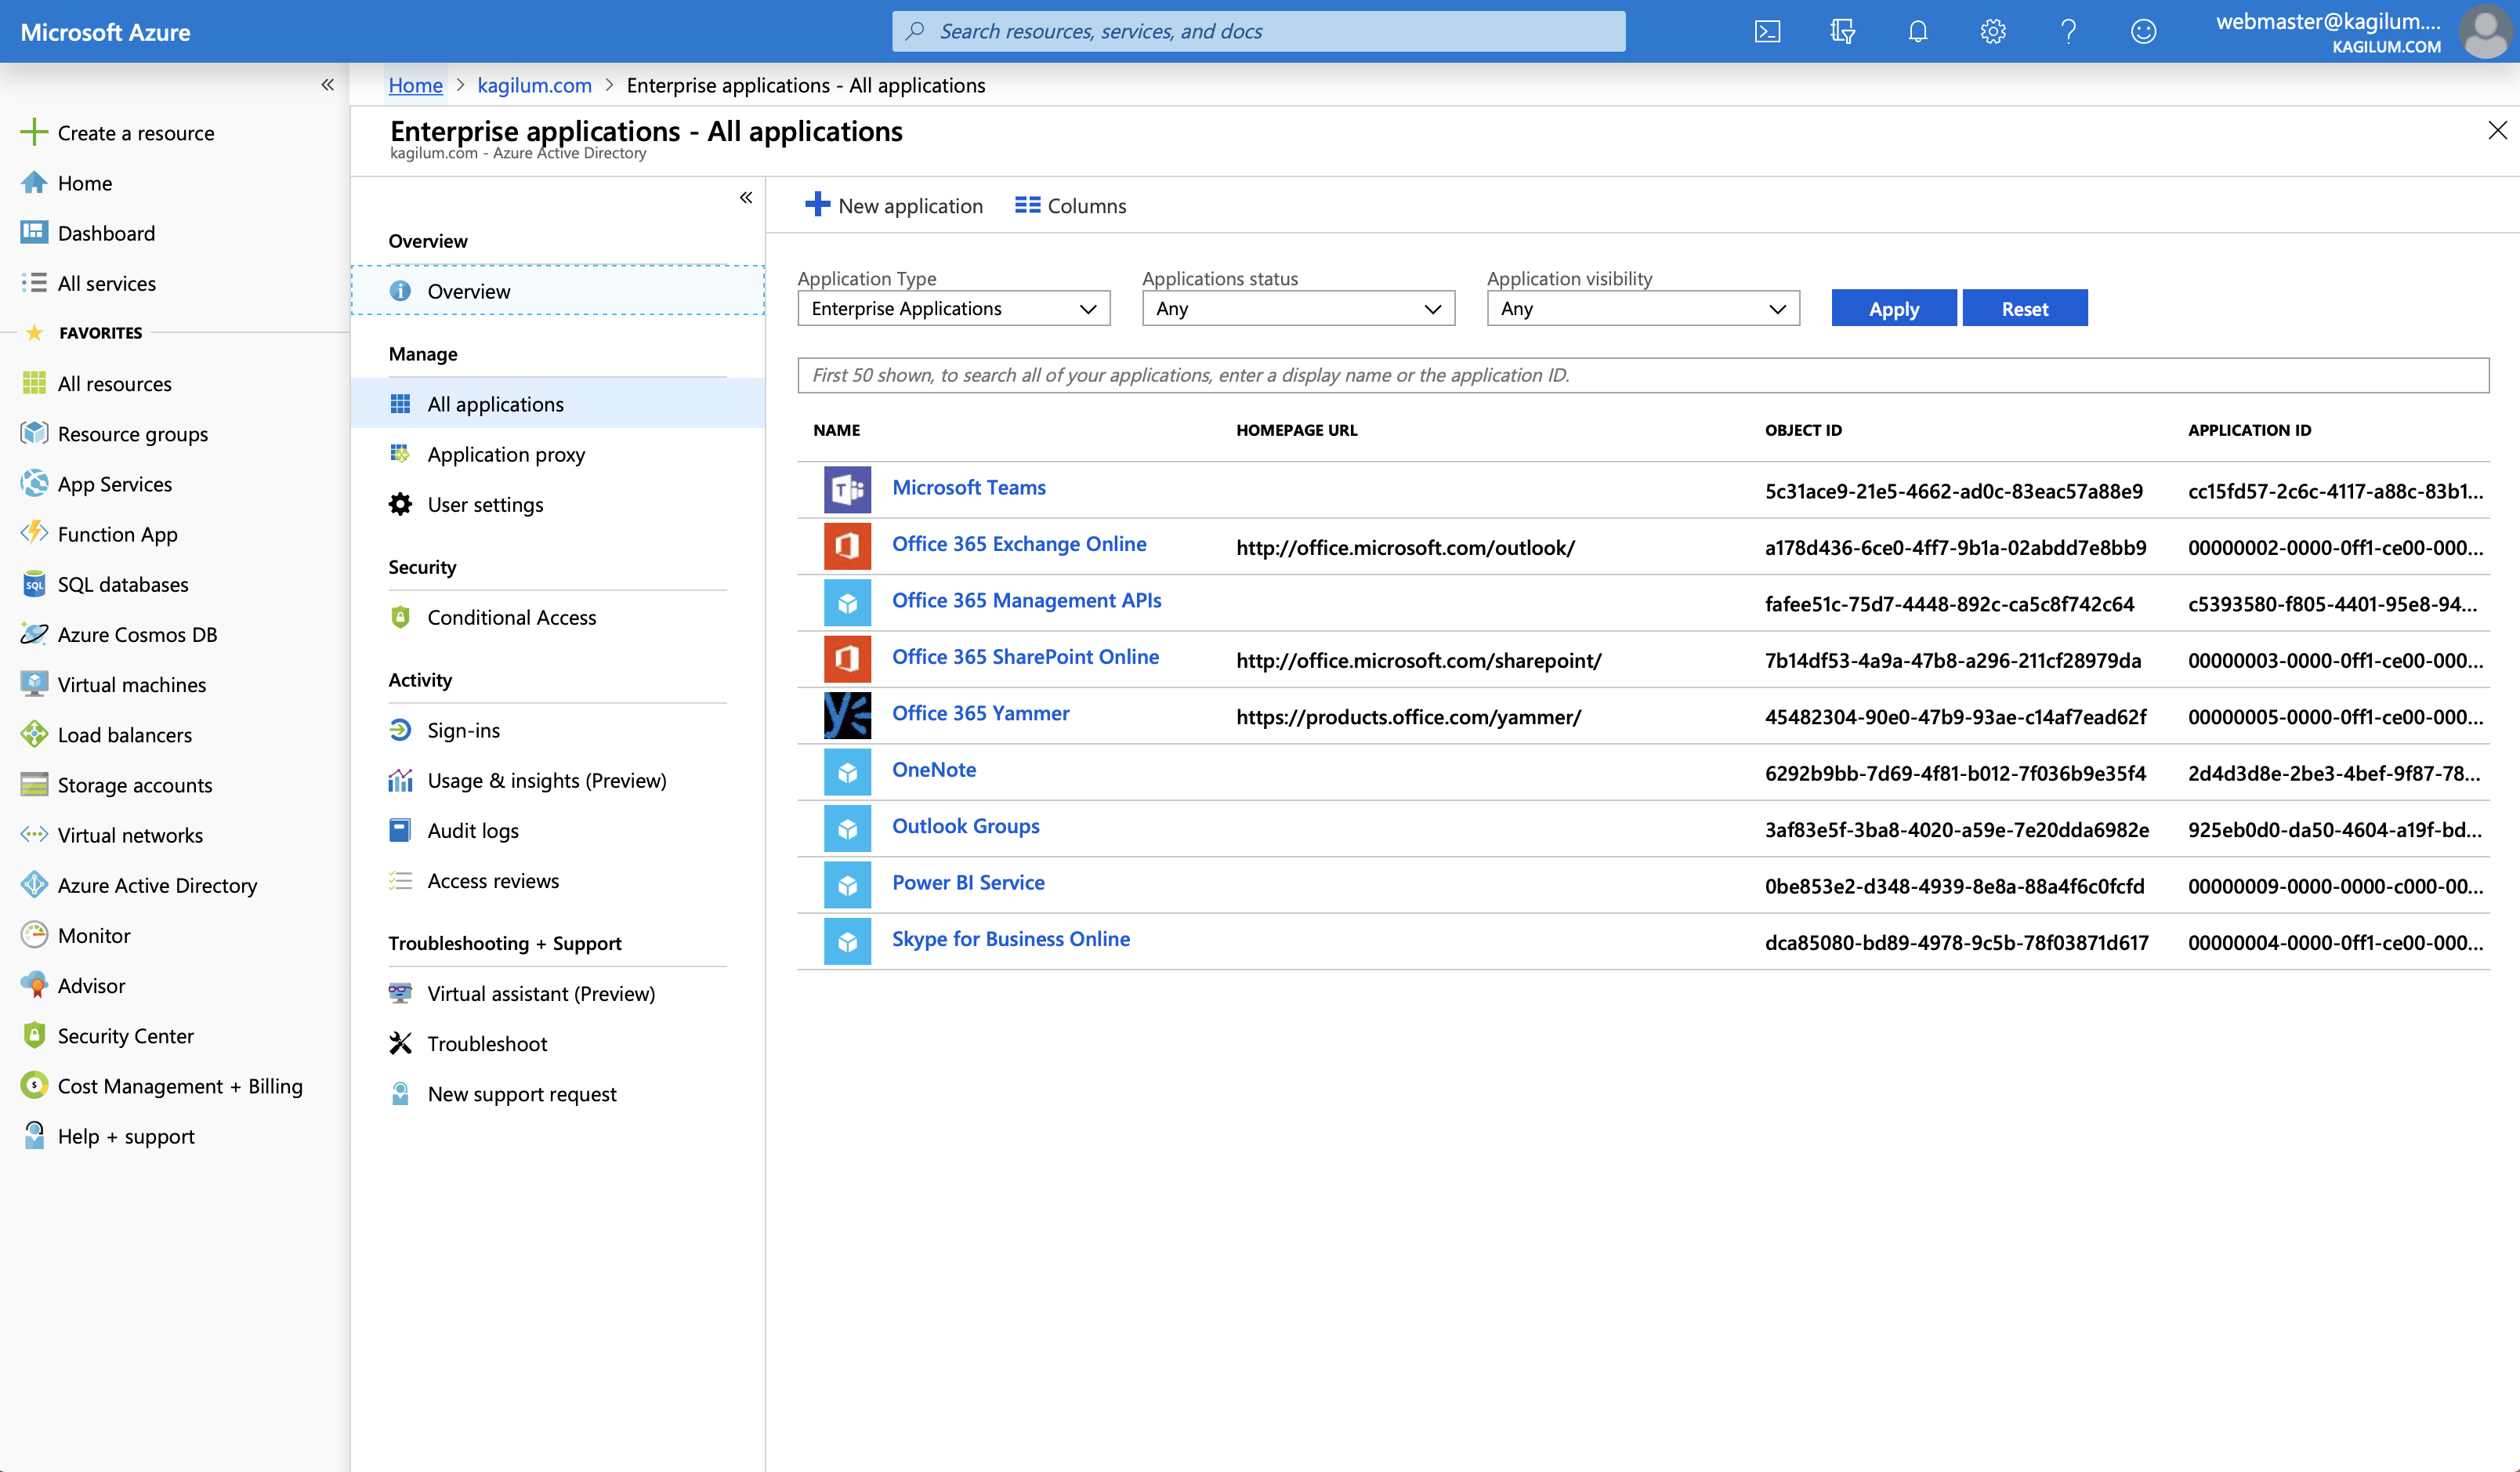
- Click on Enterprise Applications
![]()
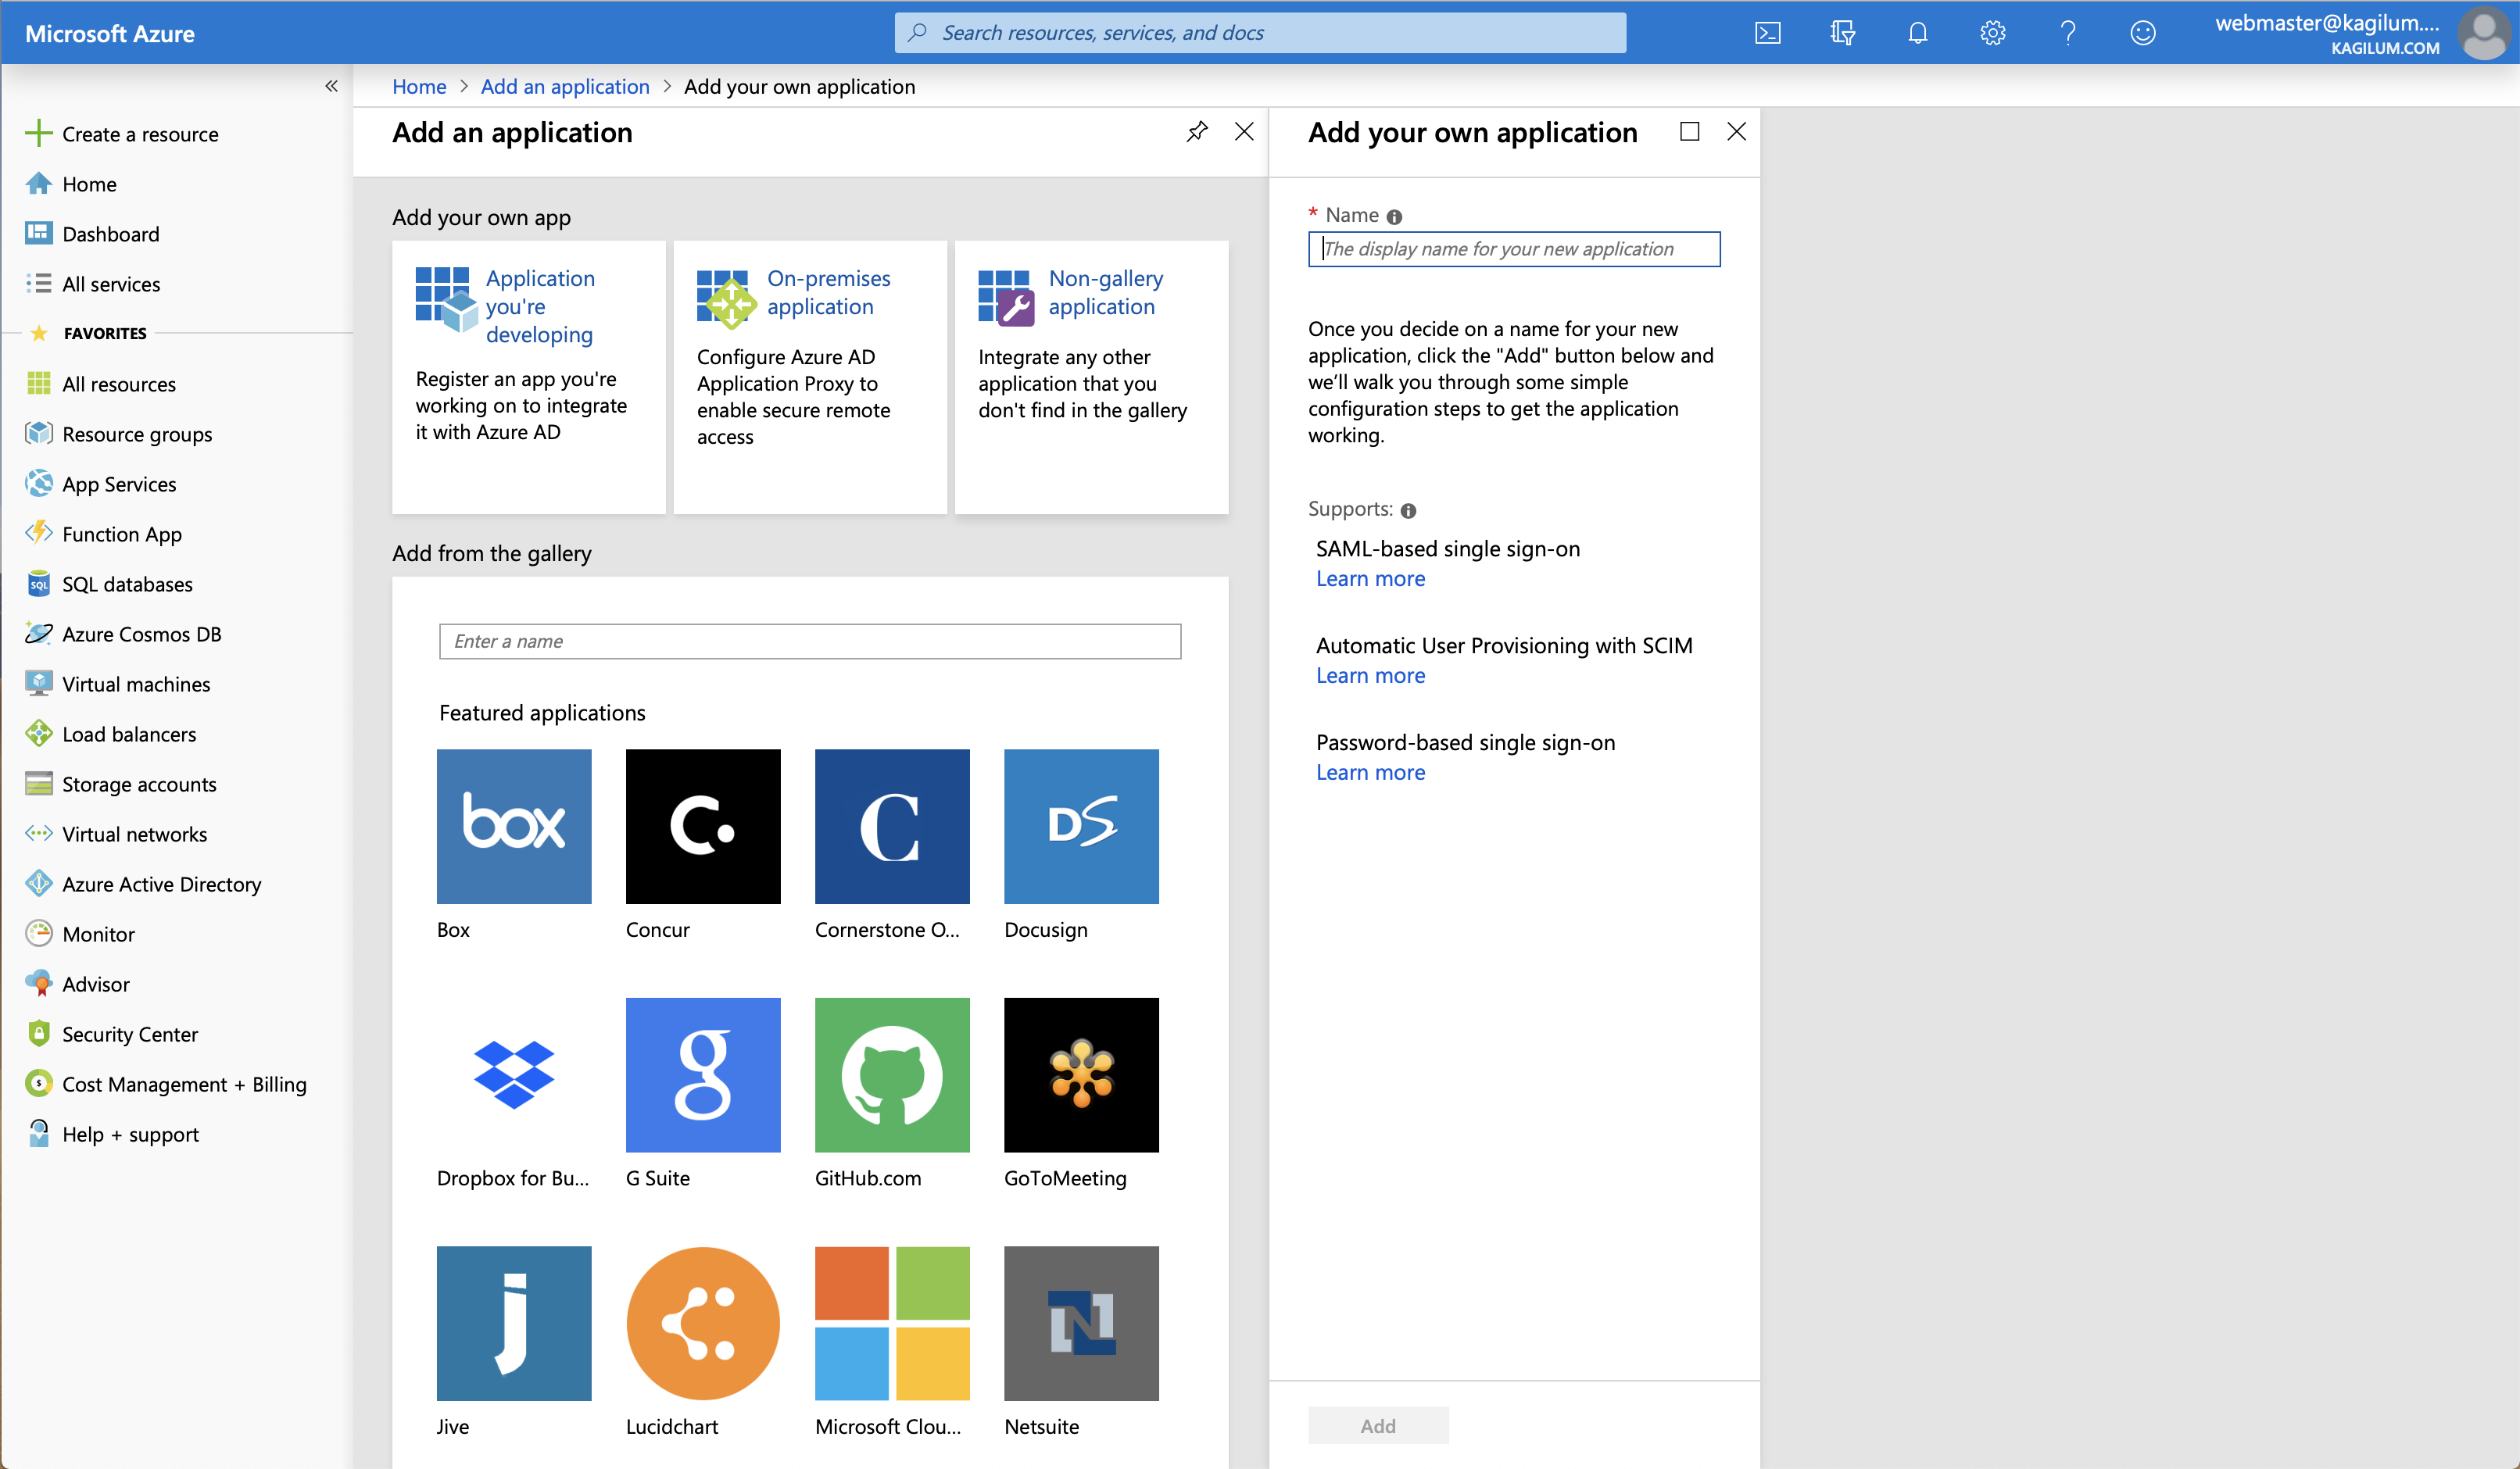
- Click on New Application & choose Non gallery application
![]()
- Save the application
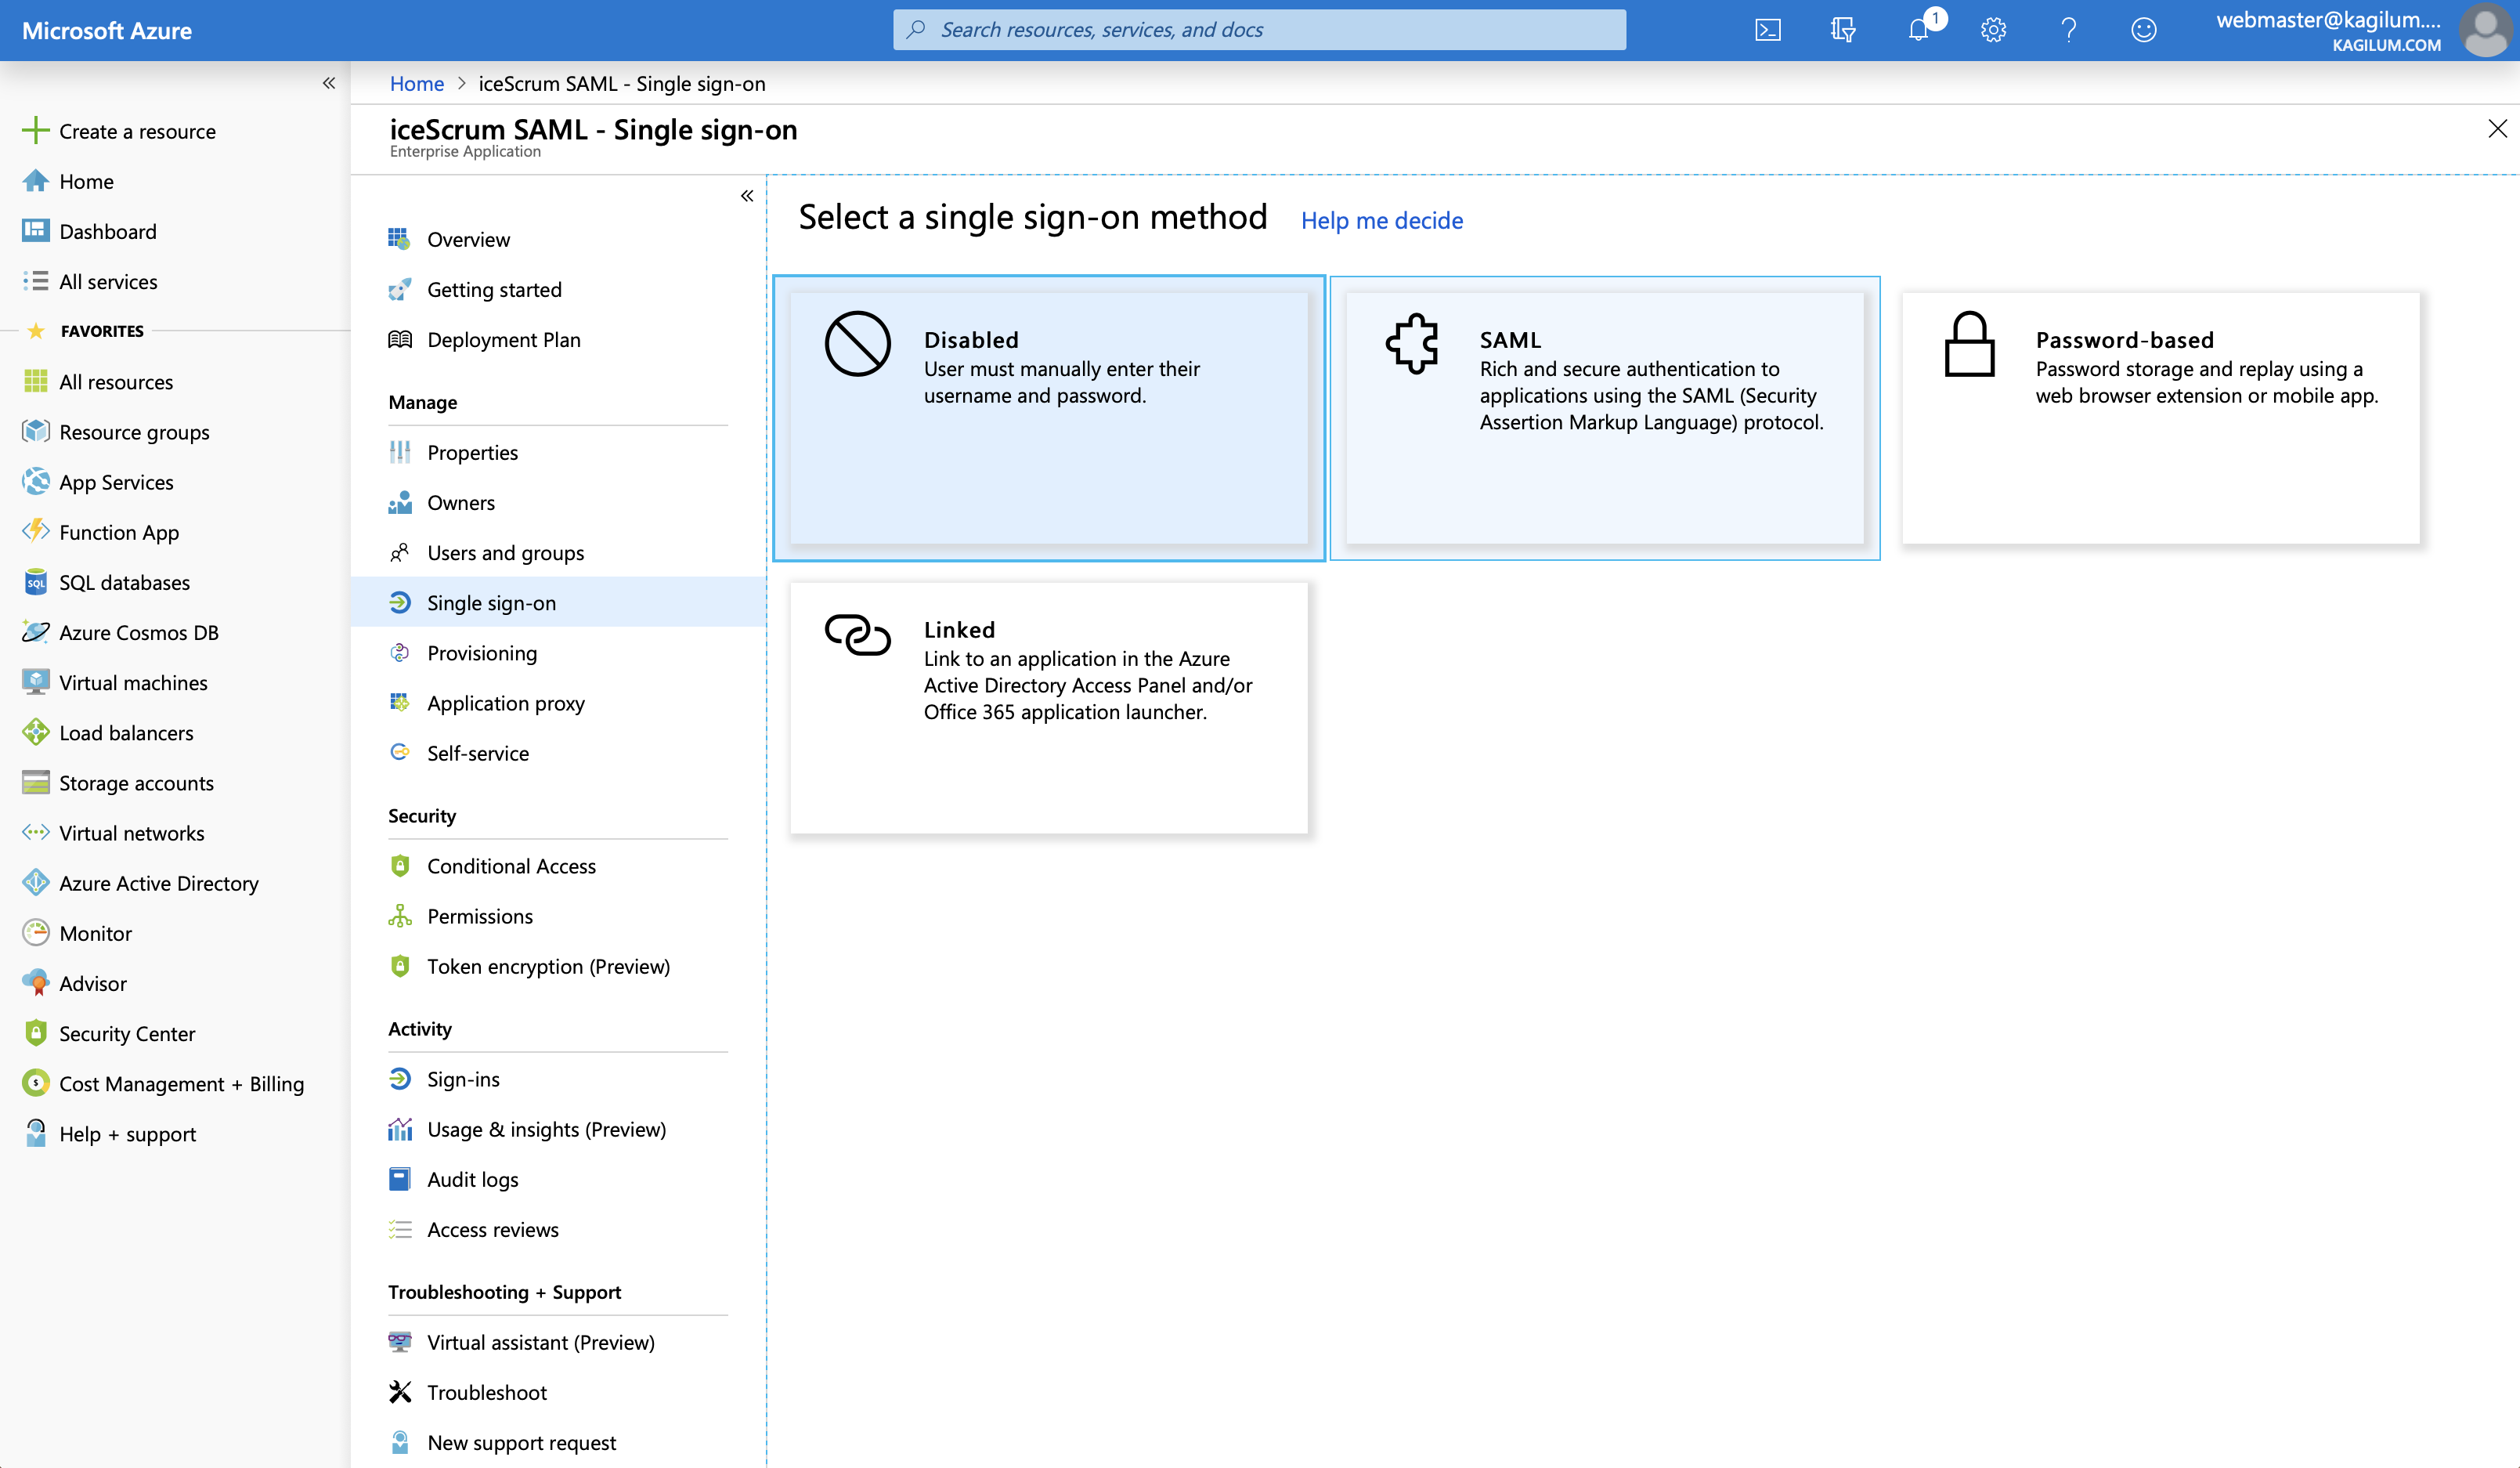
- Click on Single Sign On & choose SAML
![]()
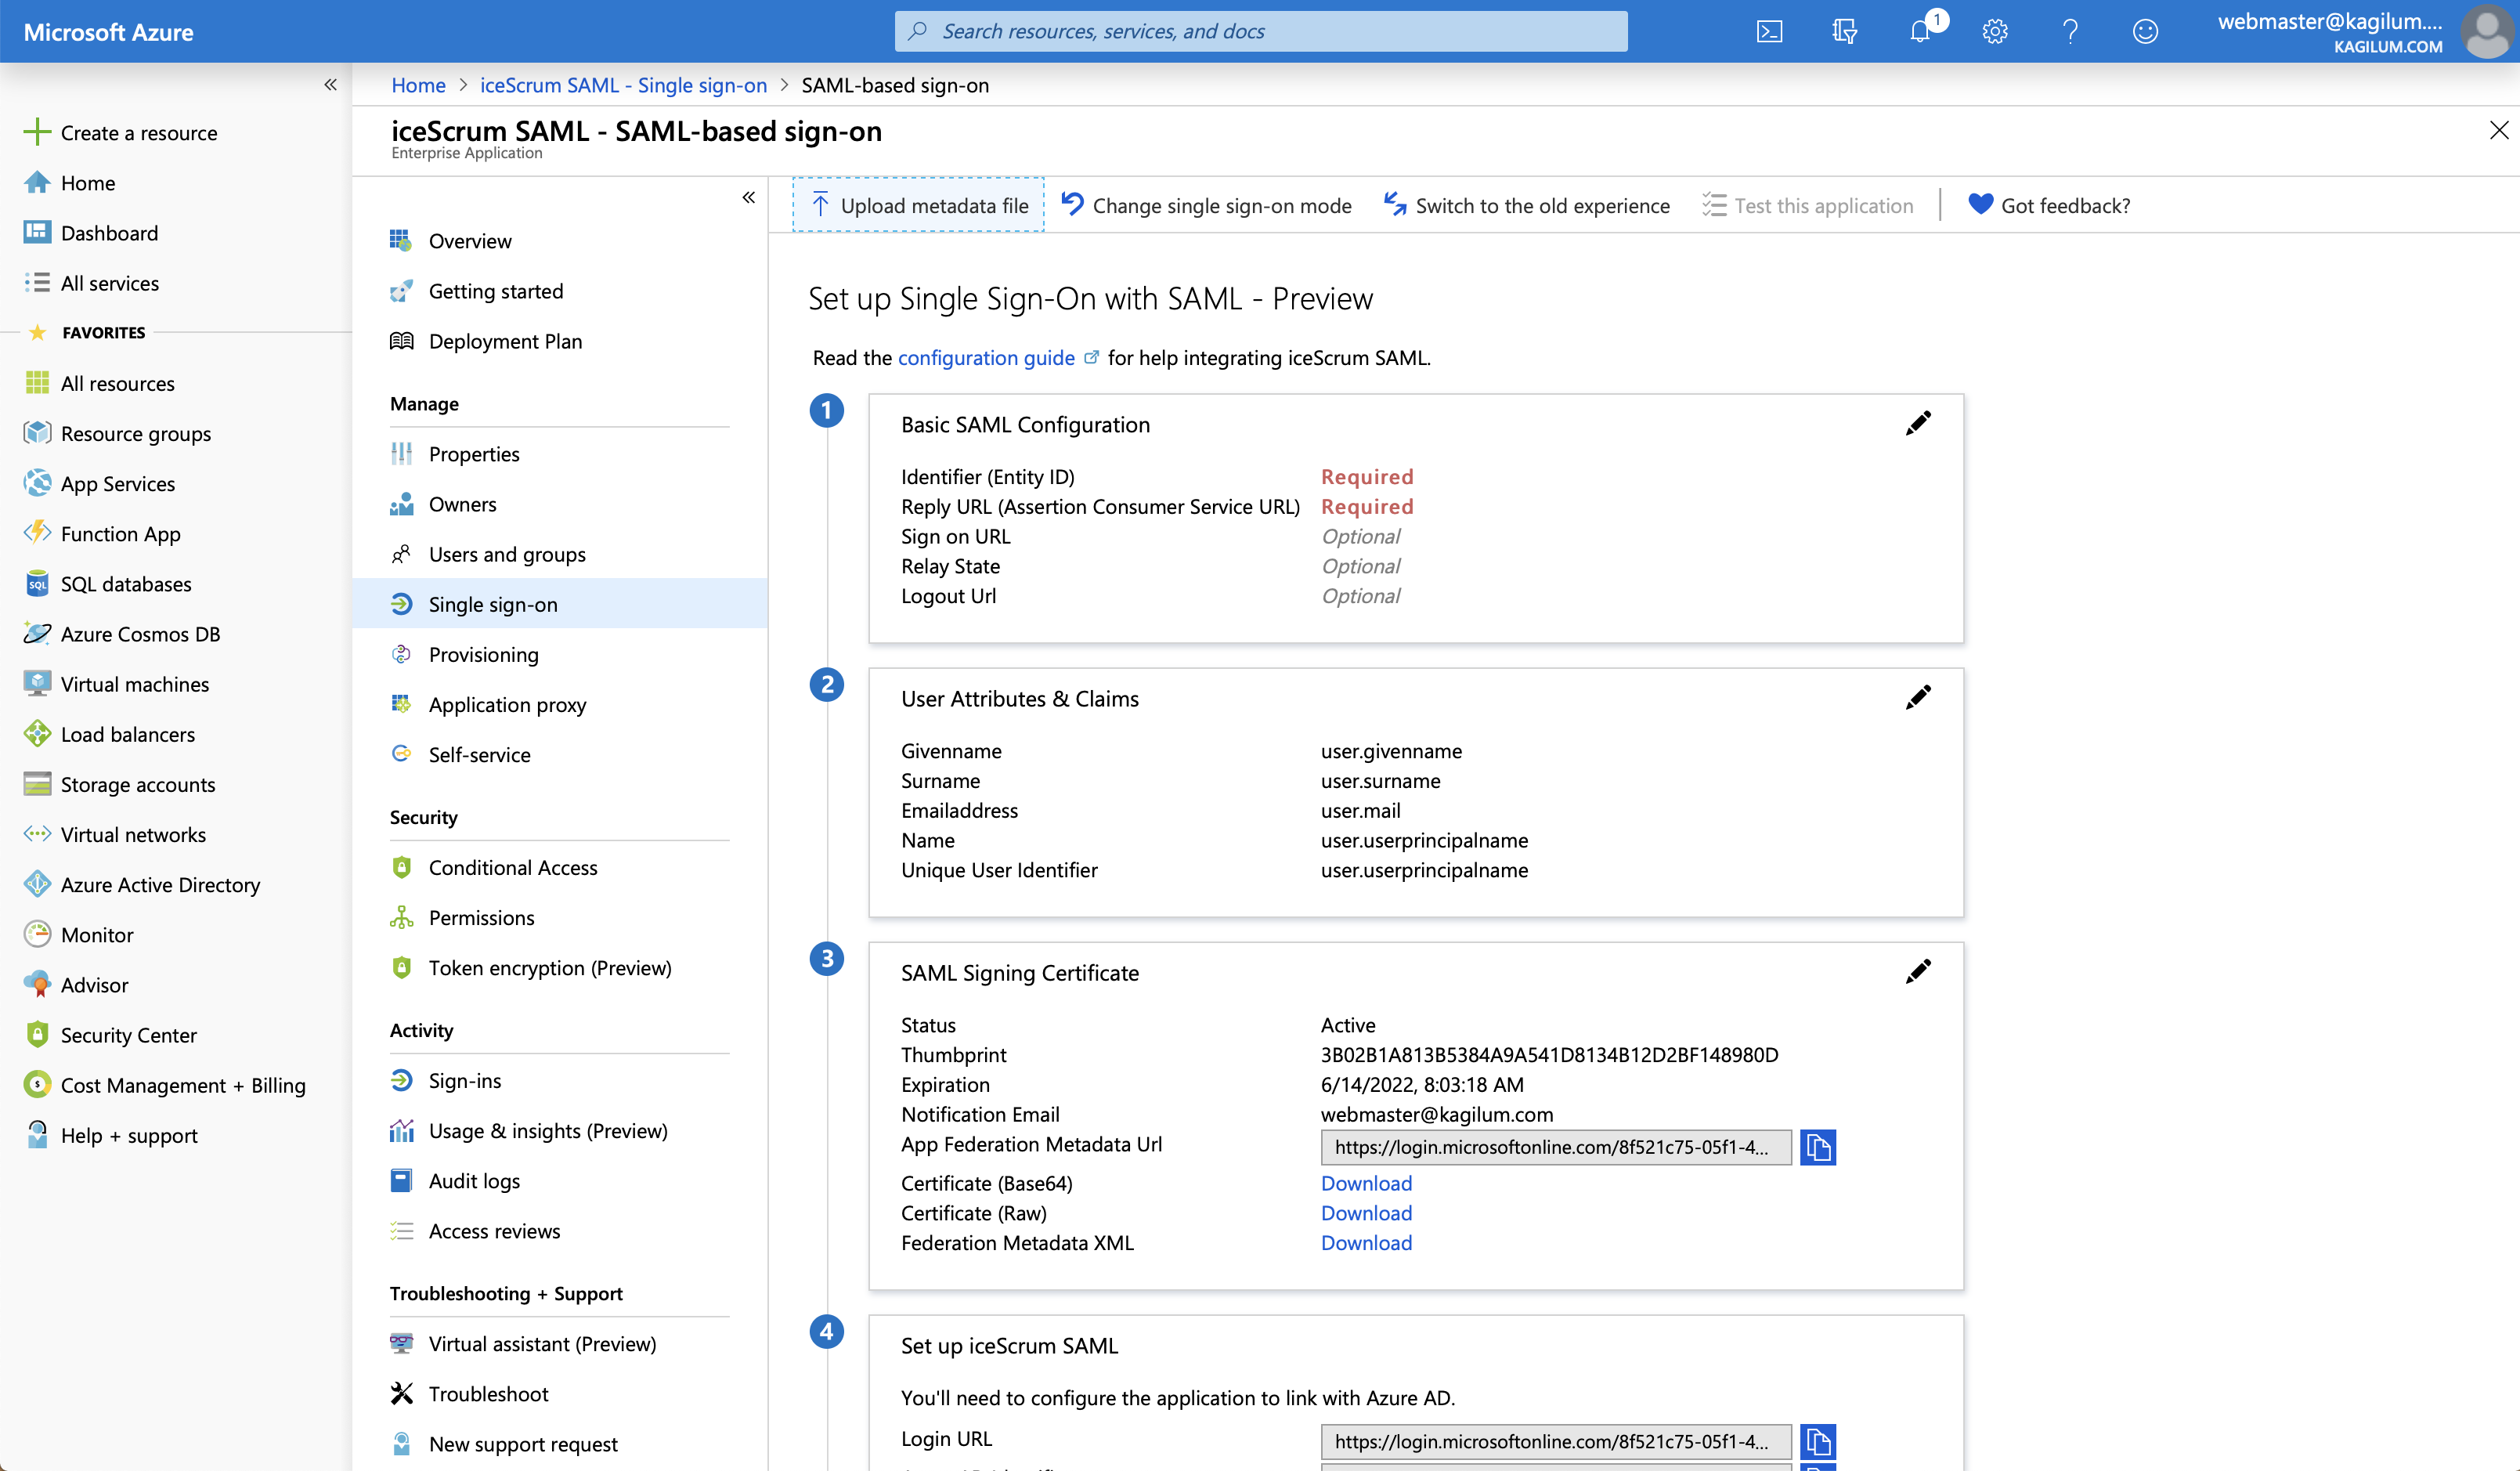
- Click on upload metadata file & choose the iceScrum metadata file downloaded earlier
![]()
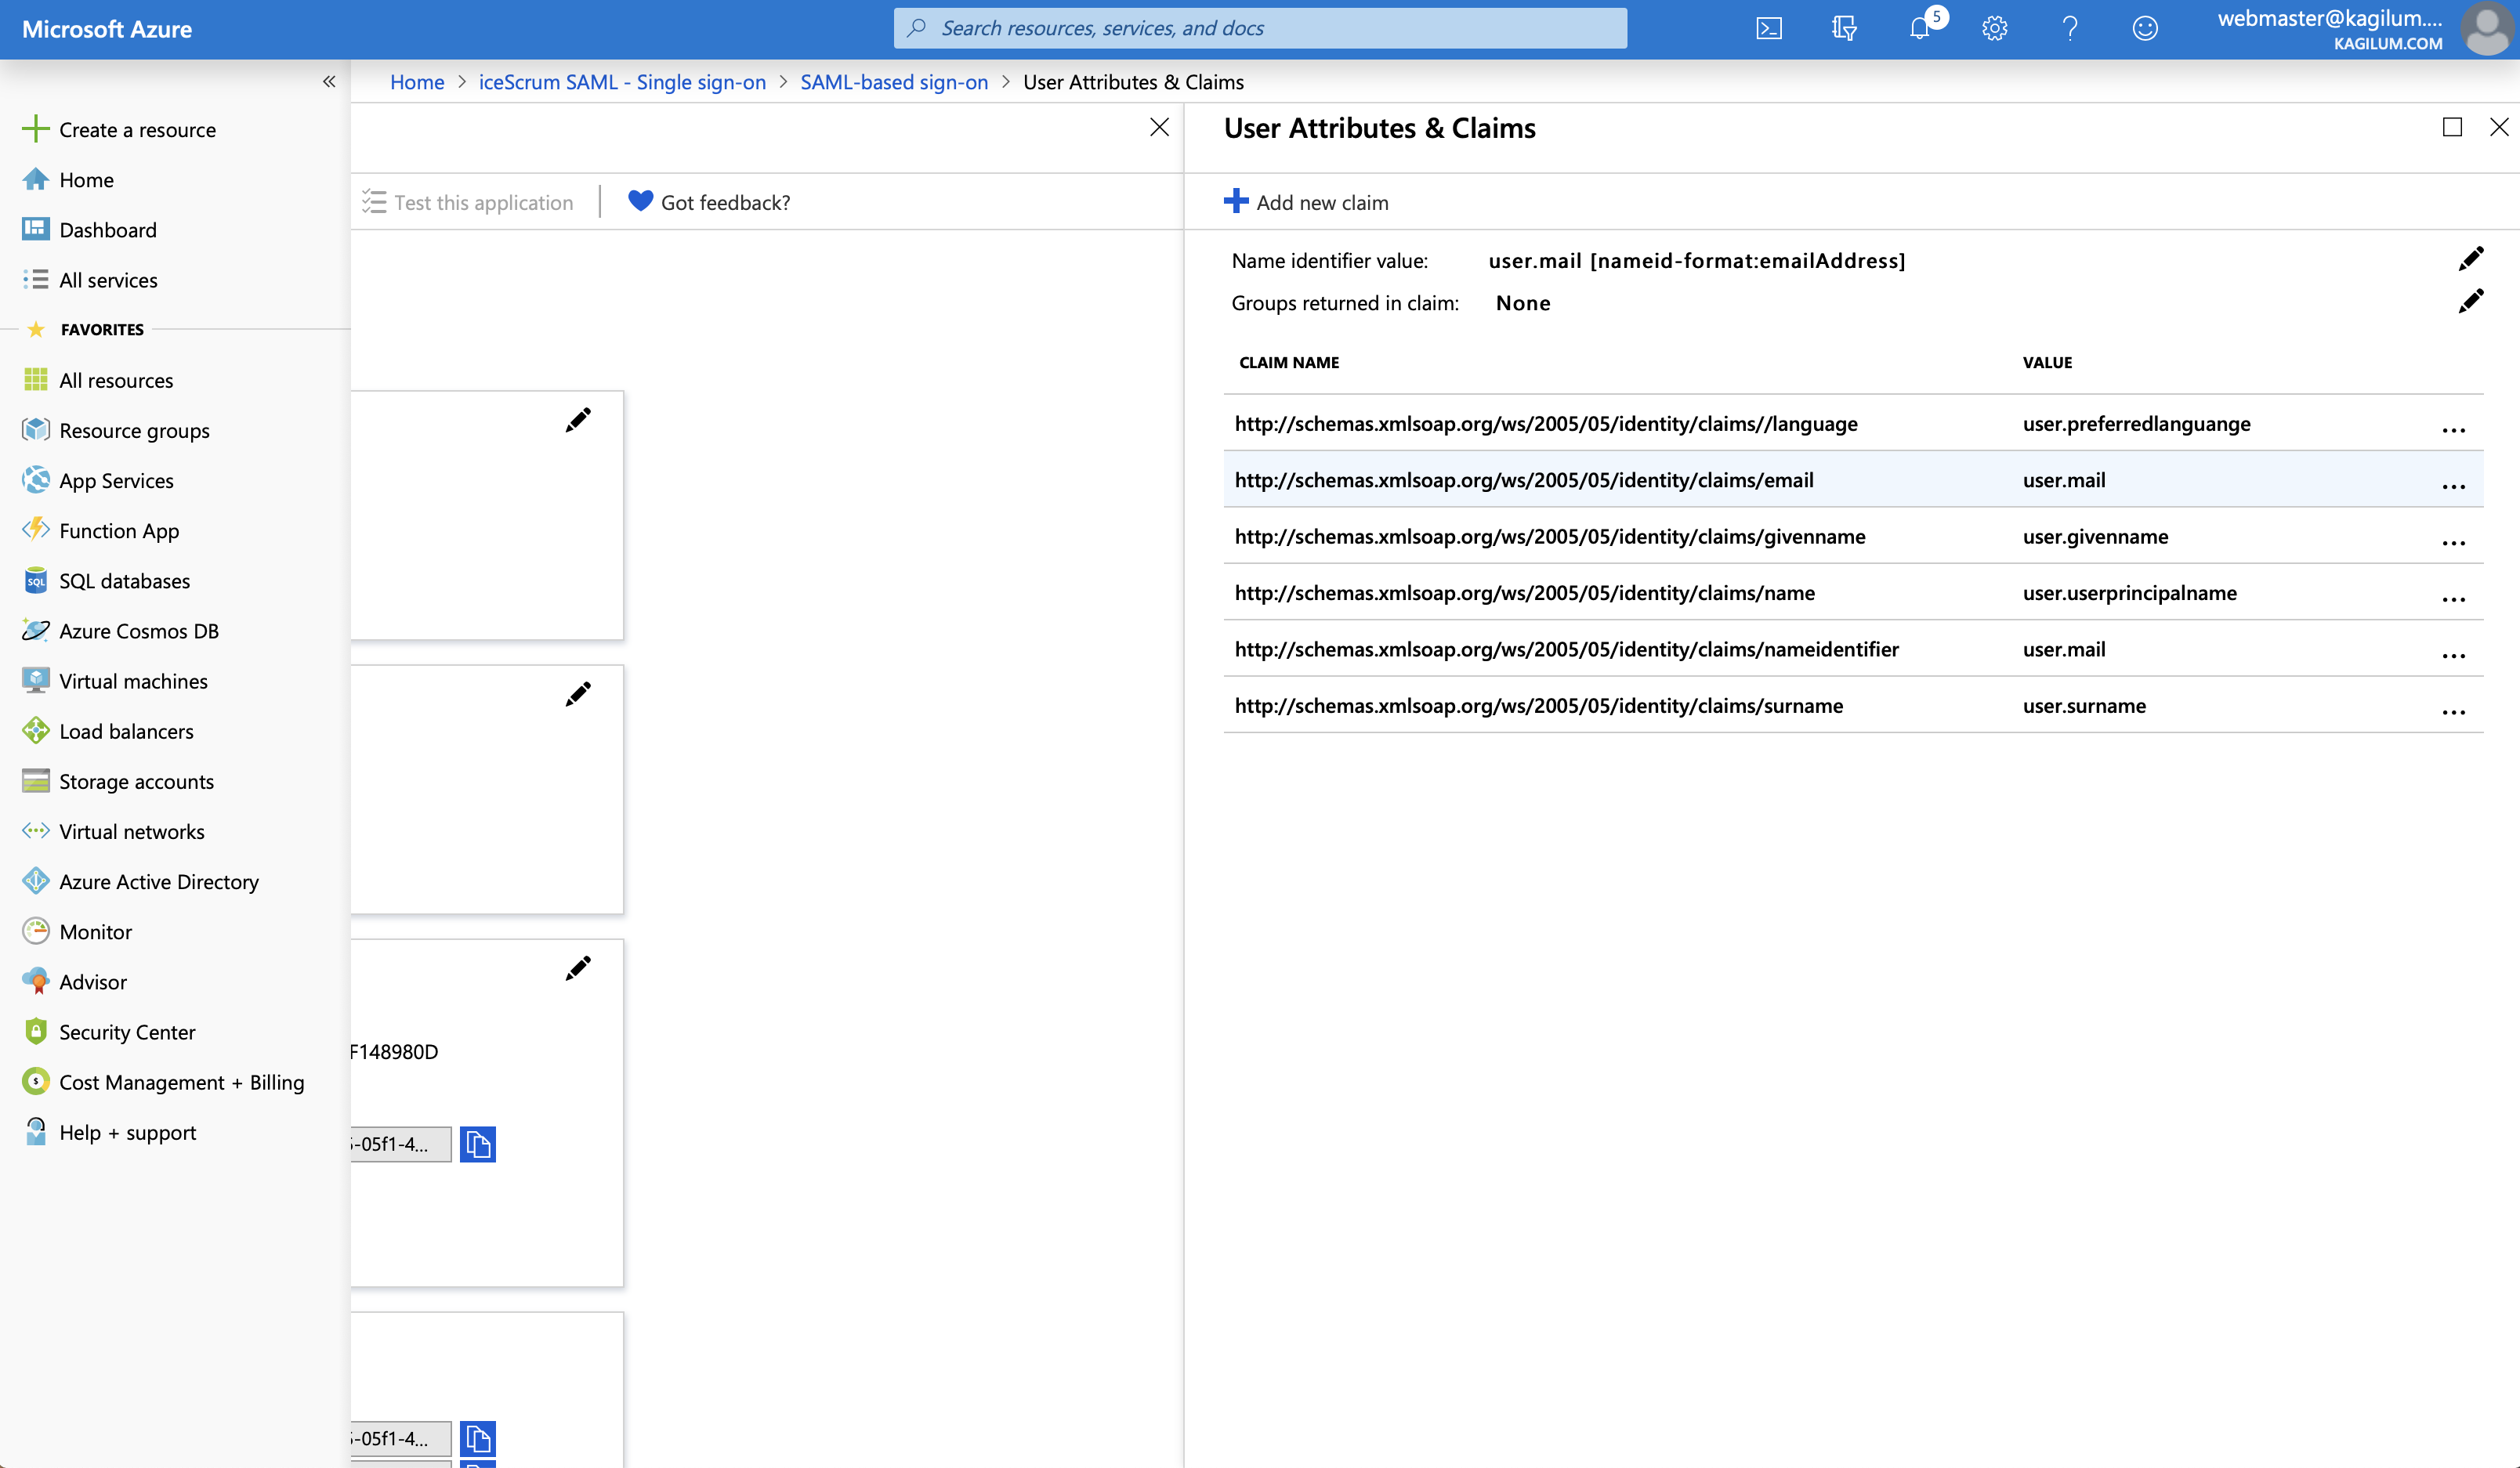
- Edit user attributes & claims like the following:
![]()
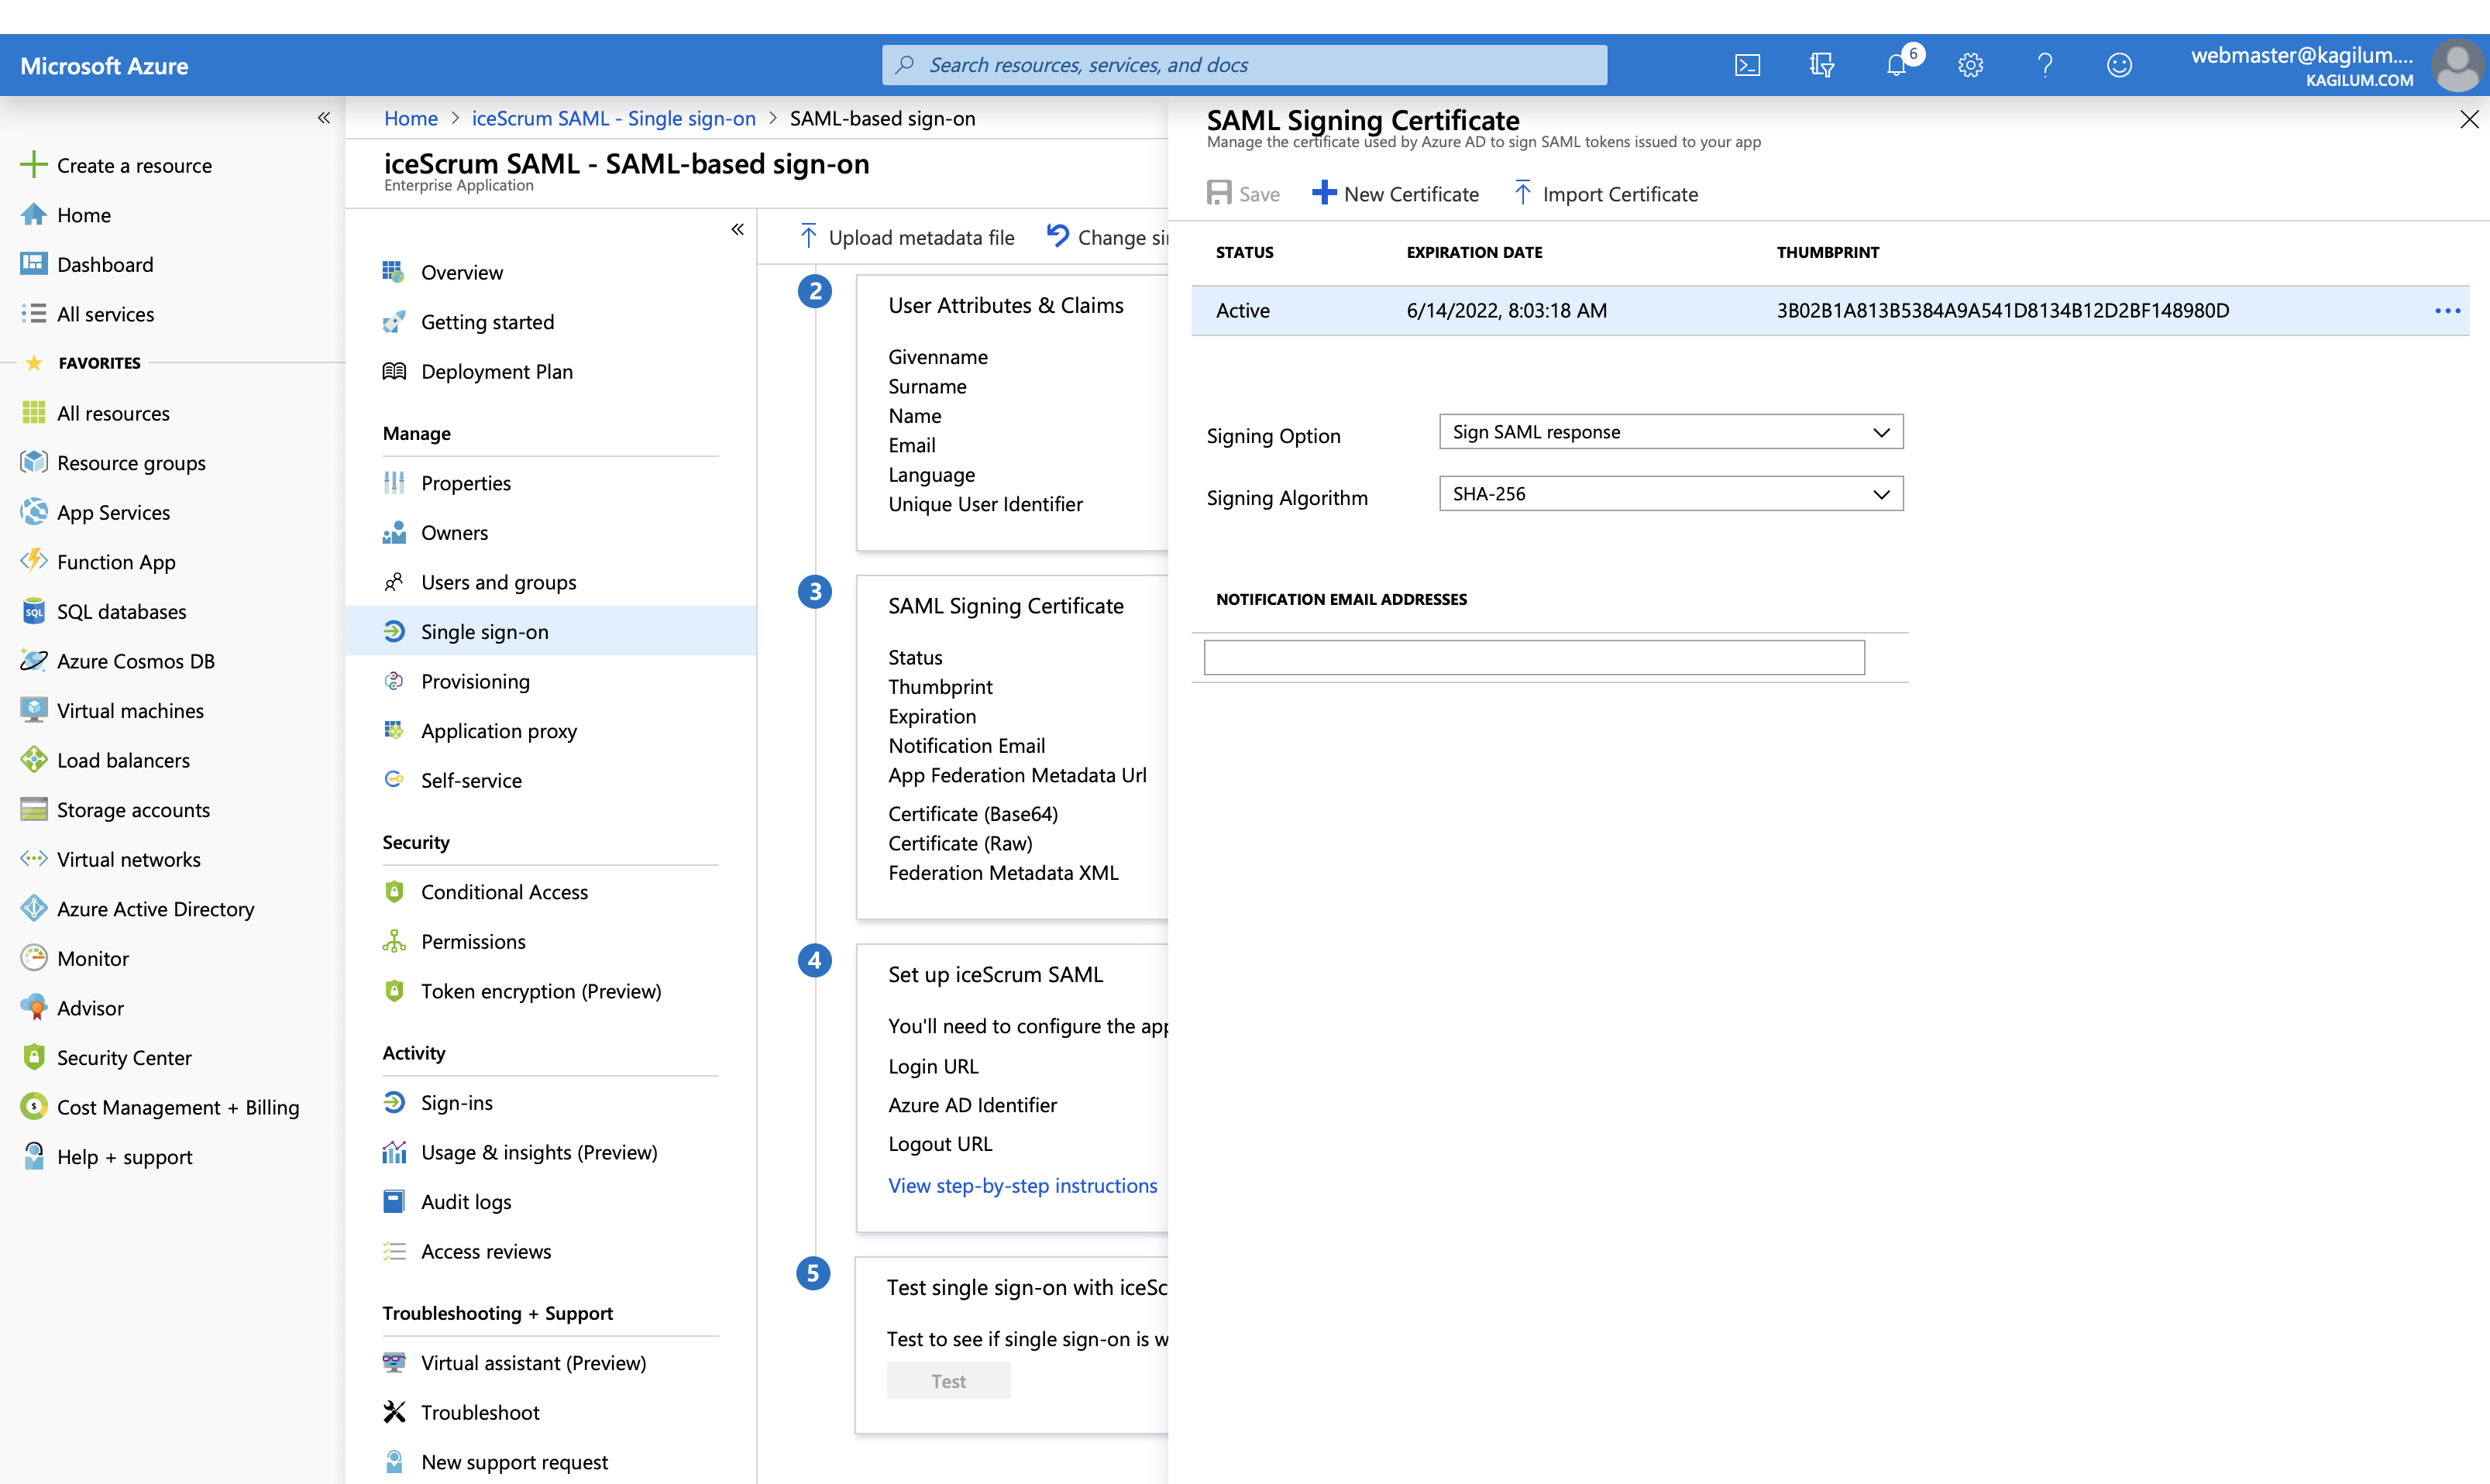
- Edit SAML Signig certificate like the following:
![]()
- Download the RAW Identity Provider Certificate (for example: iceScrumSAML.cer)
- Copy the App Federation Metadata Url
On your iceScrum server:
- Import the RAW Identity Provider Certificate into the KeyStore that was created.
keytool -import -alias adfs_provider -file iceScrumSAML.cer -keystore icescrum_saml.keystore
As an iceScrum admin
- Go back on the settings page
- IDP metadata: Paste the Federation Metadata Url copied earlier
- Save your settings
Reboot your iceScrum server to start using SAML authentication